
LED Lights for Steps Outside: Types, IP Ratings & Installation Guide
The best LED lights for steps outside are not necessarily the most popular products or those with the highest advertised weather rating. The right system…
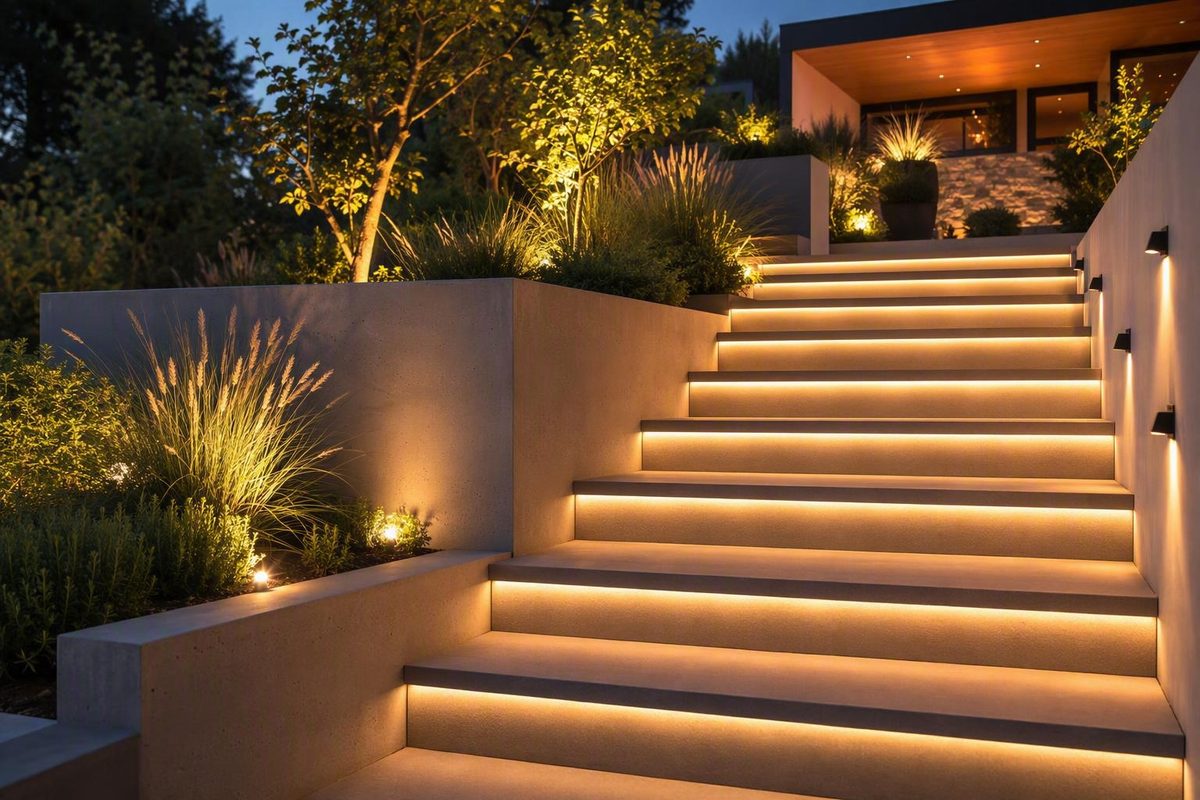
The best LED lights for steps outside are not necessarily the most popular products or those with the highest advertised weather rating. The right system depends on the staircase: its sunlight, power access, material, geometry, water exposure, mounting constraints, desired controls, and potential for future repairs.
A solar pack may fit sunny rental steps where wiring is prohibited. Shielded low-voltage fixtures may be more dependable on a shaded deck. An outdoor-rated LED strip can produce a clean line beneath a nosing—but only when the strip, channel, joints, driver, cable entries, mounting method, and drainage are planned as one system.
This guide compares those categories rather than naming one universally best product.
Start with the site: a decision tree for outdoor step lights
Before comparing finishes or pack prices, answer five questions.
-
Do the steps receive dependable direct sunlight? - Yes: Solar is a candidate, especially for a no-wire retrofit. - No or uncertain: Favor a compatible wired low-voltage system if consistent output matters.
-
Is protected power available nearby? - Yes: Compare discrete low-voltage fixtures with an outdoor-rated strip system. - No: Solar may be practical, or the project may require a new power connection completed under applicable local rules.
-
What are the stairs made from? - Wood or composite: Recessed, surface-mounted, rail-mounted, puck, and under-nosing options may be possible, subject to framing and product instructions. - Concrete, brick, or stone: Thin surface fixtures or lights mounted on an adjacent wall or hardscape may avoid difficult recess cutting. - Metal: Look for compatible fasteners, protected cable routes, isolated sharp edges, and a mounting method approved for the fixture and stair construction.
-
Can you cut suitable recesses and route cable behind the finished surface? - Yes: Recessed lights offer a low-profile appearance. - No: Consider surface-mounted, rail-mounted, adjacent hardscape, under-nosing, or solar fixtures.
-
How much water reaches the installation? - Covered stairs, wind-driven rain, irrigation spray, uncovered steps, and locations where water collects present different demands. - Evaluate every exposed component—not just the advertised rating on the light.
Where each system tends to fit
Consider solar when the steps receive reliable sun and the priority is a simple retrofit without interconnecting lighting cable or a transformer. The supplied marketplace evidence does not establish dependable winter runtime, shaded performance, battery lifespan, or independently measured brightness for specific models.
Consider wired low voltage when the stairs are shaded or the project requires repeatable output, timers, dimming, photo-eye operation, motion sensing, or coordinated controls. A wired system adds cable routing and power equipment, but it offers more design flexibility. Compatibility must still be documented among the fixtures, transformer or driver, wiring, and controls.
Consider outdoor-rated LED strip when the goal is a concealed, continuous line beneath a tread nosing, cap, or rail. This format can reduce visible gaps, but the strip alone is not a complete exterior system. The channel, diffuser, cut ends, joints, cable entries, driver, connectors, and mounting method all need protection appropriate to the location.
Also distinguish dedicated step fixtures from general outdoor lights. Marketplace “step light” categories include some broad-beam fence, wall, and security lights. Those products may illuminate an area, but they may not provide the shielding or beam direction needed to reveal tread edges without placing a bright source in a user’s sightline.
Four quick-fit examples
- Sunny rental steps with no wiring: Solar surface-mounted lights are a reasonable candidate if the property owner permits attachment. Check charging exposure and whether the batteries are replaceable.
- Shaded deck stairs near power: Shielded low-voltage riser lights may provide more consistent output and broader timer or dimmer options than solar.
- Existing masonry that cannot be recessed easily: Consider thin surface-mounted fixtures or hardscape lights attached to a nearby wall rather than assuming every stair face must be core-drilled.
- New wood stairs: Plan fixture openings, cavities, cable routes, and access points before installing finish boards. This expands the choice of recessed and concealed formats.
Solar, wired low-voltage, and LED strips compared
The three main categories solve different installation problems.
| Consideration | Solar fixtures | Wired low-voltage fixtures | Outdoor LED strip |
|---|---|---|---|
| Wiring | No interconnecting lighting cable | Cable runs to fixtures or distribution points | Cable to driver or controller and strip feeds |
| Output consistency | Depends heavily on charging and battery condition | Generally more consistent when properly designed | Generally consistent within documented run limits |
| Controls | Often built-in automatic or motion modes | Timers, dimmers, photo-eyes, motion, and some smart controls may be available | Dimming, white tuning, RGB/RGBW, timers, and smart controls may be possible |
| Routine maintenance | Clean panels; monitor batteries and seals | Clean lenses; inspect connections and power equipment | Inspect channels, seals, cut ends, mounting, and driver |
| Retrofit difficulty | Usually low | Moderate; cable routes and power are required | Moderate to high; concealment and weather detailing matter |
| Repairability | Often replaced as a complete unit; varies by model | Individual fixtures or lamps may be replaceable | A failed section may require opening a channel and remaking protected joints |
| Hidden components | Battery and charging electronics | Transformer, cable, connectors, and controls | Driver, controller, connectors, channel, diffuser, and cable |
| Dependence on sunlight | High | None | None |
| Primary design strength | No-wire simplicity | Consistency and control | Continuous, low-profile appearance |
| Common planning risk | Overestimating shaded or winter performance | Omitting transformer, cable, compatibility, or voltage-drop planning | Treating a rated strip as a complete weather-resistant system |
Solar fixtures eliminate the lighting transformer and interconnecting cable. Because marketplace listings rarely provide comparable test conditions, do not assume that similarly sized solar fixtures will deliver the same runtime or output. Marketplace examples appear in packs ranging from 4 to 16 lights, but those pack sizes do not establish equivalent performance (Amazon’s outdoor-step bestseller page).
Wired systems commonly combine compatible fixtures, exterior cable, weather-resistant connections, and a transformer or driver matched to the required voltage and AC or DC operation. Timers, dimmers, motion sensors, photo-eyes, and some smart controls can be added only where the documentation supports the combination. One installation guide describes typical 12-volt transformer systems and warns against mixing AC and DC fixtures on the same circuit (Decks.com’s low-voltage deck-lighting guide).
Discrete fixtures and strips also differ mechanically. A discrete light can be positioned where a tread, turn, or landing needs emphasis, and a failed fixture may be replaceable independently.
Seller listings illustrate the range rather than establish a standard. DEKOR lists recessed stair-lighting products filtered for 12 VDC, while one PaneraLux outdoor step strip is seller-specified for 24 VDC (DEKOR’s stair-lighting collection; PaneraLux’s outdoor step-light strip).
Never compare these formats by package price alone. A solar pack may be close to a complete product, whereas a wired-fixture price may exclude the transformer, cable, connectors, controls, channel, drilling, power connection, and labor.
Choose the mounting style for the stair material
The mounting format controls not only appearance but also how much cutting, sealing, routing, and future disassembly the project requires.
| Mounting style | Typical location | Strength | Main constraint |
|---|---|---|---|
| Recessed riser light | Inside a riser or wall face | Low-profile finish and controlled placement | Requires a cavity, precise cutout, cable access, sealing, and drainage |
| Surface-mounted riser light | Face of riser or adjacent wall | Easier retrofit with minimal recess cutting | Remains visible and may be exposed to impact |
| Tread or paver dot | Tread, landing, or paving | Compact marker effect | Requires precise drilling and careful water management |
| Puck light | Tread edge, wall, post, or hardscape | Multiple outputs and beam styles are available | Can create glare if exposed or aimed poorly |
| Hardscape light | Retaining wall, sidewall, cap, or masonry joint | Can light steps without drilling every riser | Depends on suitable adjacent structure and beam aim |
| Rail-mounted light | Beneath a handrail or inside a post system | Can conceal wiring and illuminate a broader area | Rail construction and shadows determine effectiveness |
| Under-nosing strip | Beneath a tread lip or rail | Continuous, concealed line | Needs a channel, protected joints, secure mounting, and drainage |
Wood and composite
On new wood stairs, decide where lights and cables will go before fastening finish boards. Mark joists, stringers, blocking, fasteners, and the required cavity depth. This reduces the risk of discovering after drilling that a fixture body or connector conflicts with framing.
Existing wood railings may offer cable routes beneath a cap rail or through hollow posts where construction permits. A retailer guide describes routes under rails and inside posts, but those methods are contextual rather than universally suitable; follow the railing, fixture, cable, and power-equipment instructions for the selected system (DecksDirect’s step-light installation guide).
Composite boards can be cut for fixtures, but board warranties, expansion requirements, hidden-fastener positions, and allowable penetrations need checking. Do not assume that a cutout procedure for wood transfers unchanged to composite.
Concrete, brick, and stone
Recessing into existing masonry may require specialized drilling, accurate cavity depth, and a viable route for cable and drainage. If that work is disproportionate, a thin surface-mounted fixture or an adjacent hardscape light may be a better project fit. This is not a universal recommendation: a planned masonry cavity in new construction can produce a clean installation.
Seller listings show the variety available. VOLT lists thin surface-mounted fixtures specified by the seller at 2700K and 20 lumens, along with pucks, marker lights, and a rotating hardscape fixture specified at 15 lumens (VOLT’s step-light collection). DEKOR’s collection includes recessed products and paver-dot formats. These examples demonstrate available mounting styles; they do not prove suitability for a particular masonry assembly.
Metal stairs
Metal steps may have hollow sections that can conceal wiring, but edges, welds, drainage holes, moving joints, coatings, and thermal movement complicate installation. Use mounting hardware compatible with both the fixture and stair material, protect cable from sharp edges, and avoid creating cavities where water can enter but not drain. Confirm whether drilling could affect structural coatings or warranties.
Open risers, wide stairs, and complex landings
An open-riser staircase may lack a suitable face for a conventional recessed step light. Rail-mounted, sidewall, under-nosing, or landing lights may be more practical.
Very wide steps can remain dark at the edges even when the center is marked. Curved stairs, turns, and broad landings may need layered lighting: low-output step markers combined with rail, wall, landing, or overhead light. Do not assume one small fixture can cover the entire staircase merely because it is marketed as a step light.
Pre-drilling check
Before making the first permanent opening, verify:
- Exact fixture dimensions and required cavity depth
- The manufacturer’s cutout template
- Hidden joists, stringers, blocking, pipes, cables, and fasteners
- Cable-entry and connection access
- A drainage path that does not direct water into the cavity
- Appropriate mounting hardware for the material
- Clearance for the connector or strain relief
- Whether the fixture can be removed and serviced later
- Whether drilling affects a stair, railing, cladding, or finish warranty
Plan useful light without glare or dark gaps
Fixture count depends on output, beam distribution, shielding, mounting height, stair width, landings, surface reflectance, nearby ambient light, and shadows created by nosings and rails.
One wood-deck installation guide recommends spacing step lights 3–4 feet apart in its specific system and context (DecksDirect’s spacing guidance). Treat that as a mock-up starting point, not a rule for every staircase. A narrow stair with shielded fixtures may need a different layout from a broad stone staircase with dark, nonreflective treads.
Lumens do not describe the whole result
Seller listings include marker and hardscape fixtures specified at 15–20 lumens, while certain pucks and lamp-ready products are listed from roughly 100 lumens into the hundreds of lumens (VOLT’s product collection). That range illustrates why “more lumens” is not a complete selection method.
Also compare:
- Beam angle and distribution
- Faceplate, grille, or louver design
- Mounting height and setback
- Surface reflectance
- Whether the source is directly visible when ascending or descending
- Dimming range
- Color consistency between fixtures
- Shadows from users, rails, planters, and nosings
Control glare first
Useful step lighting generally directs light toward the walking surface while hiding the bright LED from ordinary sightlines. Louvered, half-moon, grille, honeycomb, downward-directed, and concealed designs are available; retailer listings, for example, include half-moon, grille, and honeycomb low-voltage formats (LEDLightsWorld’s deck and step-light collection).
Prioritize tread edges, changes in elevation, turns, and landings. Then view the stairs from both directions. A fixture that looks comfortable from below may expose its LED to someone descending.
Continuous under-nosing strip can reduce visible gaps, but the source should normally be concealed from direct view.
Mock up the layout at night
Before drilling every opening:
- Temporarily position one or two sample fixtures, or simulate their location with a movable light.
- View the staircase from the top, bottom, sides, and nearby doors.
- Check tread-edge visibility, dark gaps, and shadows.
- Have another person walk the stairs to reveal body-cast shadows.
- Test the intended dimmed level if dimming is planned.
- Confirm that light does not spill objectionably into windows or adjacent property.
A mock-up cannot prove compliance with an illumination or accessibility standard, but it can reveal obvious layout and glare problems before the stair finish is permanently altered.
Select color temperature, controls, and serviceability
Warm-white products around 2700K–3000K are widely represented in the supplied seller listings. Cool white, selectable 3000K/4000K/6000K, RGB, and RGBW products are also offered (LEDLightsWorld’s listed color options). Warm white often complements wood, brick, and residential landscapes visually, but it is not a universal safety standard.
Fixed white, selectable white, RGB, or RGBW?
Fixed white is the simplest system. It requires fewer control decisions and may make component replacement easier if the same voltage and color specification remains available.
Selectable white allows the installer to choose among preset color temperatures during commissioning. Confirm whether selection occurs at each fixture, through a remote, or through a controller, because that affects access and synchronization.
RGB adds colored effects but does not necessarily reproduce the same white appearance as a dedicated white LED channel.
RGBW adds a separate white channel. It can provide effects plus a defined white setting, but it requires compatible controllers, drivers, cable, connectors, and control protocols.
These labels do not establish cross-brand compatibility. Two products can share a color mode or nominal voltage while using different wiring or control methods.
Choose controls for how the stairs are used
- Dusk-to-dawn: Suitable where routine nighttime illumination is wanted. Position the photo-eye where the fixtures will not confuse its ambient-light reading.
- Timer: Useful when occupancy follows predictable hours and all-night operation is unnecessary.
- Motion sensor: Can limit operating time, but may leave stairs dark until detection. Evaluate range, approach direction, delay, retrigger behavior, and whether routine low-level illumination would be preferable.
- Dimmer: Useful for reducing glare or setting a background level. The transformer or driver, fixtures, and dimmer must support the same dimming method.
- Remote control: Convenient for color or zone adjustments, but adds a receiver and future replacement dependency.
- Smart control: Can coordinate schedules and scenes, but may require a specific controller, hub, network, or cloud service.
Do not infer compatibility because two components share the same nominal voltage. A 12-volt fixture may require AC or DC, and a color-changing strip may require a particular common-anode, channel, or data protocol.
Integrated LED versus lamp-ready
An integrated fixture packages the source compactly and can enable thin shapes.
A lamp-ready fixture may accept a replaceable bulb, allowing changes in brightness, color temperature, or beam spread within the fixture’s stated limits. It may be physically larger and still depends on the socket, seal, and fixture body remaining serviceable.
Before choosing either, ask:
- Can the battery, bulb, LED module, driver, lens, gasket, or controller be replaced?
- Can a fixture be removed without opening the stair finish?
- Are replacement parts identified by model number?
- Are proprietary connectors likely to remain obtainable?
- What does the warranty exclude—water ingress, corrosion, batteries, labor, or finish changes?
- Is warranty service practical after the fixture has been built into masonry or decking?
Seller-stated lifetime warranties, LED service-life figures, and marketplace reviews are not proof of complete-system longevity. Drivers, seals, connectors, batteries, finishes, and cable can age differently from the LED package.
Match the IP rating to exposure—and protect the whole system
An IP rating describes tested ingress protection under defined conditions. In ratings such as IP65, IP67, and IP68, the first digit describes solid-particle protection and the second digit describes the cited water-ingress test.
The LED Lighting Zone guide to water-resistant LED-strip IP ratings describes the water digit as follows: 5 addresses water jets, 7 addresses temporary immersion, and 8 addresses continuous submersion to a specified rated depth. Exact product documentation and test conditions still matter.
Match the rating to the actual exposure
Use site conditions to frame the evaluation:
- Covered steps: May avoid direct rainfall but still receive condensation, cleaning water, or wind-driven spray.
- Wind-driven rain: Can reach joints and cable entries that remain dry under vertical rainfall.
- Uncovered stairs: Require evaluation for direct rain, snow, ultraviolet exposure, and repeated wetting.
- Irrigation zones: Can subject fixtures to frequent directional spray or jets.
- Pooling locations: Require attention to drainage and the product’s explicit suitability for the condition, not merely a higher IP number.
A higher rating does not automatically establish suitability for standing water, freeze-thaw cycles, coastal salt, deicing chemicals, or an inadequately protected cable entry. Check operating-temperature limits and whether the housing, finish, lens, gasket, cable jacket, and fasteners suit the environment. The supplied evidence does not justify declaring brass, stainless steel, aluminum, or plastic universally superior.
The fixture rating is not the installation rating
The completed system includes vulnerable points beyond the light:
- Splices and plug connections
- Strip cut ends and corners
- Cable entries and strain reliefs
- Driver and controller enclosures
- Transformer location
- Mounting holes and fasteners
- Channels and end caps
- Drainage behind or beneath fixtures
Likewise, an outdoor strip can lead water toward unsuitable power equipment if cable routing and drip paths are poorly planned.
Coated, sleeved, and potted strips
Sealed LED strips can use a surface coating, a surrounding sleeve, or more complete encapsulation. These constructions differ in shape, termination method, and how the factory seal is formed. Do not infer a particular construction or level of protection from marketing language alone; verify the product-specific documentation.
Every strip cut or joint interrupts the factory treatment. Restore protection only with the manufacturer’s specified end caps, sealant, connectors, or joint procedure. The cited IP guide likewise emphasizes that cut ends and joints must be resealed using the documented method.
Channel selection matters too. Its orientation should avoid trapping water, and its diffuser and end caps must suit the exposure.
Plan the low-voltage system before buying fixtures
A fixture is only one line in the system specification. Assemble the complete design before ordering.
Component checklist
- Fixtures or exterior-rated LED strip
- Compatible transformer or driver
- Exterior-rated low-voltage cable
- Weather-resistant connectors or the manufacturer’s plug-and-play harness
- Mounting hardware appropriate to the stair material
- Channel, diffuser, clips, and end caps for strip where applicable
- Compatible timer, photo-eye, dimmer, sensor, remote receiver, or smart controller
- Suitable power connection and enclosure arrangement
- Junction, splitter, hub, or distribution components if specified
- Replacement seals, batteries, lamps, or modules where available
- Labels or records identifying circuits and component models
For every component, document:
- Operating voltage
- AC or DC requirement
- Wattage or watts per unit length
- Polarity
- Control or dimming protocol
- Environmental rating
- Operating-temperature range
- Maximum supported run
- Cable requirements
- Connector and enclosure requirements
Size the transformer or driver as a process
First calculate connected load:
Fixture quantity × fixture wattage = connected load
Hypothetical example: Eight fixtures rated at 2 watts each produce a connected load of 16 watts.
That calculation does not automatically identify the correct transformer. Apply the selected transformer’s documented loading range, capacity allowance, cable-run guidance, control compatibility, and environmental requirements.
Published commercial guidance is not consistent enough to justify one universal margin. Decks.com suggests adding 10% for line loss, while the Aurora guidance reproduced by Ideal Garden Lights says to total the wattage and choose the next larger transformer (Ideal Garden Lights’ installation guide). These are different instructions in different contexts, not universal design rules. The selected fixtures’ and transformer’s documentation controls.
Long runs, unsuitable cable gauge, poor connections, and wiring layout can contribute to voltage drop and uneven output. A strip may also have a maximum continuous run or require additional feed points. Do not assume that a driver with adequate total wattage can power any cable length or strip configuration.
High-level installation sequence
- Plan fixture locations, beam direction, cable routes, power location, drainage, and service access.
- Mark framing and known utilities before drilling.
- Route the cable using the selected system’s documented protection method.
- Make weather-resistant connections using the specified connectors or splice procedure.
- Preserve polarity where required.
- Connect compatible power and control equipment.
- Test every fixture, control mode, and intended dimmed state.
- Inspect brightness at the far end of each run.
- Only then fasten fixtures and close access points permanently.
Keep plug-and-play and manual-splice procedures separate. Plug-and-play systems use specified hubs, splitters, extension cables, and keyed connectors. Hard-wired low-voltage systems require the splice method documented for the cable, connectors, and environment.
General planning guidance does not supersede manufacturer instructions or applicable local requirements. Decks.com notes that requirements can vary and states that installing a new outlet or hard-wiring a transformer may require electrical permitting. New outlets, panel work, line-voltage connections, and work beyond the installer’s competence should be referred to a qualified electrician.
Compare total project cost and use a pre-purchase checklist
Prices for LED lights for steps outside span inexpensive solar packs, basic individual fixtures, premium architectural lights, and component-based strip systems. These categories are not directly comparable.
Price snapshots, not installed-cost estimates
The following seller-displayed prices were taken from the supplied page captures reviewed on August 26, 2026. Prices and availability can change:
- The first 14 complete entries displayed on Amazon’s outdoor-step bestseller page ranged from $18.99 to $43.85, mostly for solar products sold in packs (Amazon’s bestseller page).
- Best Pro Lighting listed basic LED step fixtures at $19 per fixture (Best Pro Lighting’s step-light category).
- DEKOR listed recessed stair lights starting at $18.76 per light, depending on configuration (DEKOR’s stair-lighting collection).
- VOLT listed thin integrated cast-brass fixtures at $89.99 each.
- PaneraLux listed one outdoor step-light strip at $88, with several selectable lengths shown on the seller’s page (PaneraLux’s strip listing).
These figures are seller-provided snapshots. They do not represent equivalent quantities, specifications, included components, or complete installed costs.
Total-cost worksheet
| Cost item | Quantity or basis | Unit cost | Estimated total | Verified as included? |
|---|---|---|---|---|
| Fixtures or strip | ||||
| Transformer or driver | ||||
| Exterior cable | Length | |||
| Connectors, hubs, or splitters | ||||
| Channel, diffuser, clips, and end caps | Length | |||
| Timer, sensor, dimmer, or controller | ||||
| Power connection or enclosure work | ||||
| Woodworking, drilling, or masonry work | ||||
| Shipping and taxes | ||||
| Professional labor | Hours or quote | |||
| Future batteries, lamps, or components | Expected cycle |
For a strip project, determine whether the listed price is per reel, per meter, or for a complete kit. For discrete fixtures, confirm whether cable leads, lamps, faceplates, connectors, mounting screws, and the transformer are included.
Pre-purchase verification checklist
Verify the following from product-specific documentation rather than category-level marketing:
- Actual lumen output and available beam information
- Nominal and permitted operating voltage
- AC or DC compatibility
- Wattage per fixture or per unit length
- Polarity requirements
- IP documentation and stated test conditions
- Operating-temperature range
- Product-level third-party electrical certification records, where applicable
- Transformer or driver loading rules
- Maximum run and cable guidance
- Dimming or control protocol
- Included cable, connectors, mounting parts, and power equipment
- Replacement battery, bulb, module, seal, driver, and controller availability
- Warranty exclusions and claim procedure
- Return policy, especially after wires or strips are cut
- Suitability for the actual stair material and exposure
Where a certification mark is claimed, verify that the available record matches the exact product model rather than relying on a brand-wide or collection-level statement.
Sales rank, star ratings, and large review counts indicate sales activity or reported customer sentiment at a particular time. They are not evidence of electrical safety, weather resistance, glare control, or long-term durability.
Maintenance checklist
Inspect the system periodically and after severe weather:
- Clean fixture lenses and solar panels
- Remove debris that blocks drainage
- Check for corrosion or finish failure
- Tighten loose fasteners where permitted by the instructions
- Look for cracked lenses, damaged seals, or displaced end caps
- Replace failing solar batteries only with documented compatible types
- Inspect accessible cable for cuts, abrasion, or animal damage
- Compare brightness across fixtures for signs of voltage drop or component failure
- Confirm that timers, photo-eyes, sensors, dimmers, and smart controls still operate as intended
- Check strip channels for trapped water, detachment, or diffuser damage
Retain manuals, invoices, cutout templates, wiring diagrams, and warranty terms. Record the model numbers of the transformer, driver, controller, fixtures, lamps, and replacement batteries. That project file can turn a future repair from a redesign into a component replacement.
Frequently asked questions
Are solar or wired LED lights better for outdoor steps?
Solar is often the better candidate for sunny, no-wire retrofits where variable output is acceptable. Wired low voltage is generally the stronger candidate for shaded stairs, consistent output, coordinated controls, or a designed lighting layout.
Solar performance depends on charging exposure, temperature, battery condition, panel placement, and product design. Wired systems require more components and installation planning.
Can outdoor step lights be installed without cutting into concrete or wood?
Yes. Thin surface-mounted fixtures, rail-mounted lights, adjacent hardscape fixtures, and many solar lights can be installed without cutting a full fixture recess. Cable holes or fasteners may still be required.
Under-nosing strip is another option where there is a suitable concealed mounting surface, protected cable route, and appropriate drainage.
How far apart should outdoor step lights be placed?
There is no universal interval. One wood-deck guide recommends 3–4 feet in its specific context, but actual spacing depends on fixture output, beam shape, shielding, stair width, mounting height, surface reflectance, landings, and ambient light.
Mock up the selected fixture at night before drilling all openings.
Is IP65 or IP67 better for exterior stairs?
IP67 has a different, higher water-ingress test than IP65, but “higher” does not automatically mean suitable for a particular staircase. In these ratings, the second digit describes water protection: 5 addresses water jets, while 7 addresses temporary immersion under specified test conditions.
Covered steps may have different exposure from uncovered stairs, irrigation zones, or pooling locations. Verify the specific product documentation and protect all splices, cable entries, drivers, connectors, and cut ends.
Do low-voltage outdoor step lights need a transformer and an electrician?
Most wired low-voltage fixtures need a compatible transformer or driver unless compatible power equipment is already built into the documented system. Solar fixtures do not need a lighting transformer.
Whether low-voltage work is appropriate for a homeowner depends on the product, installation, competence, and local requirements. New outlets, panel work, line-voltage connections, permit-triggering work, and tasks beyond the installer’s competence should be handled by a qualified electrician.
A final selection sequence
Evaluate sunlight and available power first. Match the fixture format to the stair material and decide whether recessing is realistic. Choose a shielded layout, then verify the exposure rating and installation details of every component. Document voltage, AC or DC operation, load, polarity, and control compatibility. Calculate the total system cost—not just the fixture pack—and test the lighting at night before permanent installation.
A coherent, serviceable system matters more than marketplace popularity or a high IP number printed on one component.