
3 LED Diffuser Strip Types and How to Choose Between Them
A hands-on comparison measured 22% average brightness loss for a shallow channel and 36% for a deep one, so smoothness must be weighed against usable output.
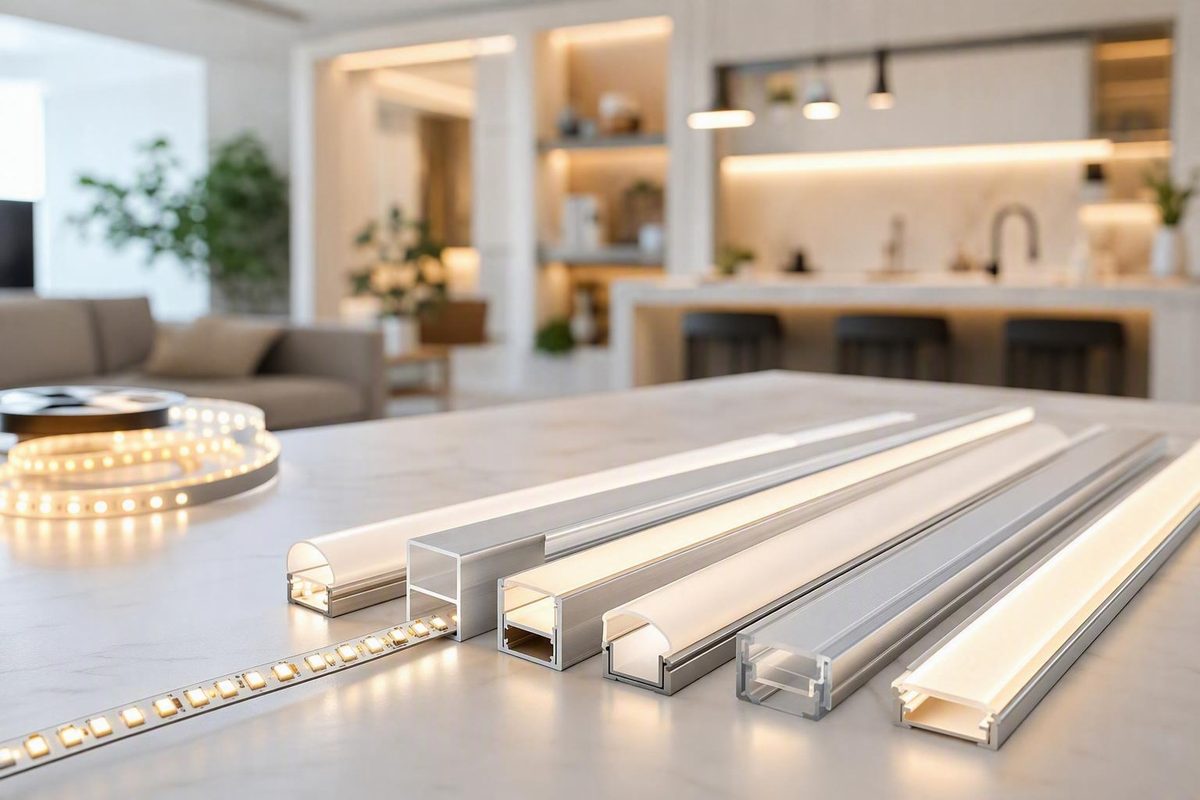
By Tomas Reyes, low-voltage electrician
Editorial note: This guide distinguishes seller specifications from third-party testing and general installation guidance. It does not imply that LED Lighting Zone performed the cited product tests.
An LED diffuser strip can make exposed tape lighting look more like a finished linear fixture. It can soften glare, protect the tape from casual contact, and reduce the visibility of individual diodes. It cannot rescue every combination of sparse LEDs, shallow mounting, and close viewing without sacrificing substantial brightness.
The best result comes from treating the tape, profile, lens, mounting geometry, and installation environment as one system. Define how smooth the light must look, determine how much useful illumination you need, and then choose the least aggressive diffuser that meets the visual target.
First, identify what sellers mean by an LED diffuser strip
“LED diffuser strip” is not a precise product category. Depending on the listing, it may mean:
- A translucent lens that snaps or slides into an aluminum channel
- A complete channel-and-lens set
- A self-adhesive cover placed over existing tape
- A flexible sleeve for curved installations
- An integrated neon-style enclosure containing or accepting LED tape
A diffuser, in the narrow sense, is the translucent cover that scatters light from the LEDs. In a conventional rigid-profile system, it is only one component. A complete installation may require:
- LED tape
- Aluminum channel or profile
- Compatible diffuser lens
- End caps
- Mounting clips, brackets, screws, or adhesive
- Wire, connectors, and controls
- A driver or power supply compatible with the tape
Do not assume those parts arrive in one box. Some channel kits include covers, clips, and end caps but no LEDs. Other listings are for a lens alone. A flexible enclosure may exclude the tape, profile, connectors, and driver.
There are three broad formats to compare.
Rigid channel system: An aluminum profile holds the tape in a straight line and accepts a matching lens. This is a comprehensive approach for visible under-cabinet, shelf, stair, or wall-mounted lighting. The channel supplies alignment, mounting structure, some physical protection, and a larger structure across which heat can spread.
Diffuser-only retrofit: A self-adhesive or otherwise surface-mounted cover can be added without installing a conventional aluminum profile. It may be useful where an existing strip is already fixed in place or where there is insufficient room for a channel.
For example, Armacost describes its product as a self-adhesive, frosted-polycarbonate diffuser for indoor, dry locations. Its listing says the package contains five one-meter sections and that the covers can be cut to size. These are manufacturer specifications, not independent proof of optical performance, and the listing should not be read as including a channel, tape, or power supply unless the current package description expressly says so on the Armacost product page.
Flexible sleeve or enclosure: This format suits curves, routed grooves, signage, and shaped furniture. It must bend in the required direction and fit both the tape and its mounting path. The Lille listing, for example, describes a flexible rubber-PVC diffuser sold separately from LEDs, profiles, and accessories. Its diagram gives approximate dimensions of 10 mm at the base, 13 mm overall width, and 6.7 mm in height on the retailer’s Lille diffuser listing.
Before ordering, read both the “included” and “required accessories” sections. Confirm whether the package contains the tape, channel, cover, end caps, clips, wiring, connectors, and driver.
Why a diffuser reduces dots but cannot guarantee a dotless line
The diffuser finish is only one part of the optical geometry. The finished appearance is determined by the interaction of:
- Distance between adjacent LEDs
- Distance from the LED tape to the lens
- Lens opacity, thickness, texture, and shape
- Installation angle
- Direct or reflected viewing
- Viewing angle and distance
- LED color or color temperature
- Dimming level
- Brightness of the surrounding room
A translucent cover scatters light before it reaches the viewer. If adjacent pools of light overlap sufficiently at the lens, the cover can appear as a continuous line. If the LEDs are widely spaced and the lens sits almost directly above them, each emitter may remain visible as a bright point.
That is why a deeper channel can blend light more effectively than a shallow one. Greater separation gives light from neighboring LEDs more room to overlap before it reaches the diffuser. Depth is not free, however: a taller profile needs more installation space, and the complete assembly may lose more output depending on its shape and lens.
Higher-density tape is generally easier to blend for the same reason. Reducing the gap between emitters reduces the dark area the optical system must conceal. Density alone still does not guarantee a smooth result; diode size, channel depth, lens shape, viewing conditions, and output level remain relevant.
Installation geometry can be just as important. A strip viewed head-on from a short distance exposes imperfections that may disappear when the same assembly is mounted above eye level. Likewise, a corner profile changes the direction of the light but does not necessarily provide more LED-to-lens distance than a flat profile.
Treat “dotless,” “spotless,” and “continuous” as conditional descriptions. They are partly subjective unless the seller specifies the exact tape, LED spacing, profile, lens, brightness, color, and viewing conditions used.
The safest approach is to assemble and power a short sample in the intended location. Test it:
- From the closest normal viewing position
- At full output and expected dimmed levels
- In daytime and nighttime conditions
- With the intended white temperature or RGB colors
- At the angle from which the finished run will normally be seen
A sample answers the question that a diffuser name cannot: whether this particular system looks smooth enough in this particular room.
Balance smoother diffusion against lost brightness
Diffusion is a compromise between concealment and useful output. A clear cover allows more direct light through but reveals the emitters. A more strongly scattering lens redirects more light and can absorb or trap some of it within the assembly. A smoother appearance therefore generally comes with lower measured illumination.
A 2022 hands-on comparison illustrates the possible scale of that tradeoff. The reviewer measured an average brightness reduction of 22% for the tested shallow channel and 36% for the tested deep channel. With 60 LEDs per meter, the tested deep curved “spotless” configuration reduced brightness by 56%, compared with 35% for the tested tented diffuser in The Hook Up’s channel comparison.
Those figures are examples, not specifications for all shallow, deep, curved, or tented products. The comparison covered one reviewer’s selected tapes and profiles and did not provide the instrumentation detail or uncertainty data expected from laboratory testing. The article also contains affiliate links, although the reviewer stated that the products were purchased and the review was not sponsored.
This limitation matters. Two lenses both described as “opal” may use different pigmentation, thicknesses, textures, and polymers. Their channels may also have different depths, internal finishes, and lens shapes.
Do not use a general transmission percentage as a purchasing guarantee unless it comes from product-specific documentation using a relevant test method. Even then, lens transmission alone will not predict illumination from the complete assembly.
For decorative accent lighting, some output loss may be acceptable in exchange for a calmer line. Task lighting is less forgiving. Under a cabinet, shelf, worktop, or stair detail, verify useful illumination after the cover is installed. A system that looks perfectly smooth but no longer lights the intended surface adequately has solved the wrong problem.
When output matters, compare the assembled fixture with and without its diffuser. If possible, measure at the actual work surface rather than judging by how bright the lens looks. A luminous-looking cover may distribute light attractively while delivering less light where it is needed.
Choose clear, frosted, opal, milky, or shaped lenses by priority
Diffuser terminology varies among sellers, but the broad categories can guide an initial shortlist.
Clear covers prioritize output and physical coverage. They may protect the strip from dust or contact while making little difference to visible diode points. Choose one when brightness, beam control, or easy cleaning matters more than a continuous glowing line.
Frosted covers add surface scattering and generally provide more blending than clear covers. They are often a practical starting point for medium- or high-density tape, particularly where the fixture is not viewed from very close range.
Opal and milky covers usually indicate stronger concealment, but the terms overlap. One seller’s opal may resemble another seller’s frosted or milky white. Evaluate a sample instead of assuming a fixed order of opacity or a universal transmission value.
Smoky, gray, or black covers should not be treated as automatically superior diffusers. A dark lens may reduce visible output without scattering the light enough to eliminate points. In the cited 2022 comparison, the tested milky-white cover blended better than its smoky-gray counterpart; the smoky cover substantially reduced brightness while leaving individual LEDs visible. That was a product-specific outcome, but it shows why darkness and diffusion should not be confused.
Shape also matters:
- Flat lenses keep the finished profile compact but may sit relatively close to the LEDs.
- Curved lenses can provide extra central distance or alter the optical path.
- Tented or raised lenses increase separation in a different way and may improve blending without requiring a deep channel.
- V-shaped and corner lenses aim light outward from an angle but do not necessarily scatter it more effectively.
Do not select a shape in isolation. A curved cover with little height might blend less effectively than a taller, flat-looking assembly. The complete cross-section is what matters.
Common material categories include polycarbonate, acrylic or PMMA, PVC, and silicone. The material name alone does not establish impact resistance, operating-temperature suitability, fire performance, UV stability, scratch resistance, or weather resistance. Formulation, thickness, additives, construction, and product certification all matter. Request product-specific documentation for demanding environments.
Flexible silicone or rubber-PVC products are candidates for curves, but flexibility has limits. Confirm the supported bending direction, minimum bend radius, tape width, enclosure dimensions, and whether the product can twist.
Match LED density and channel depth before increasing opacity
If visible dots are the main problem, do not immediately reach for the darkest lens. Work through the geometry first.
LED density is commonly described in LEDs per meter. The following figures are useful comparison points rather than universal recommendations:
- 30 LEDs/m: Large gaps make blending difficult, especially in a shallow profile or at close viewing distances.
- 60 LEDs/m: Smaller gaps are easier to conceal and may offer a practical compromise among cost, power, and appearance.
- 144 LEDs/m: Close emitter spacing makes smooth results more achievable with a lighter diffuser, although power demand and heat may increase.
In the cited hands-on test, 30 LEDs/m remained difficult to conceal in the tested visible configurations. The reviewer selected 60 LEDs/m as the preferred balance of appearance, power consumption, and price, but that was a judgment about those products—not an industry rule. At 144 LEDs/m, the tested tented and curved configurations both appeared spotless to the reviewer, while the tented option retained more brightness in the same 2022 comparison.
A practical decision sequence is:
- Increase viewing distance if the design permits. Moving a visible fixture farther from the normal sightline may make minor points less noticeable without changing components.
- Use indirect light where possible. Hiding the tape and reflecting its light from a wall, ceiling, or cabinet surface removes the direct view of the emitters.
- Choose a deeper profile. More LED-to-lens distance generally improves overlap.
- Increase tape density. Smaller emitter gaps reduce the amount of optical concealment required.
- Increase diffuser opacity only as much as necessary.
Replacing sparse tape with denser tape may preserve more useful output than forcing widely separated LEDs behind an aggressive lens. Denser tape may also require more power and generate more heat, so check the tape’s specified wattage, driver capacity, wiring, voltage drop, and profile suitability.
Modern COB tape is another possible route to a visually continuous line because its emitting structure differs from conventional, widely spaced SMD packages. That does not establish that every COB strip will outperform high-density SMD tape in the same channel. Compare actual samples at the required brightness and color quality.
The goal is not the highest available density or the most opaque cover. It is the least complicated combination that provides acceptable smoothness, illumination, power demand, and heat management.
Select the profile for the surface, corner, recess, or curve
Choose the physical format according to both the mounting location and the desired optical result.
Low-profile surface channels fit under shelves, cabinets, and narrow trim where installation depth is limited. They keep the fixture compact but leave less room for light to blend. Use denser tape or accept some visible texture when the lens will be viewed closely.
Deeper surface channels require more space but can improve blending. They are useful where the light line is directly visible and smoothness matters more than minimizing the extrusion.
Recessed or flanged profiles create a flush architectural finish. The body sits in a routed groove or prepared opening while the flange covers the cut edge. Plan the body width, groove depth, flange width, wire entry, and diffuser installation method before cutting. A profile that fits the groove may still be difficult to wire or service.
Corner, 45-degree, or V-shaped profiles direct light outward from the junction between two surfaces. They can work inside cabinets, at wall-to-ceiling transitions, or under front cabinet rails. Their angle solves an aiming problem, not necessarily a diffusion problem. Check the lens-to-LED distance rather than assuming a corner profile will be smoother.
Rigid channels suit visible under-cabinet runs, shelves, stairs, wall-mounted accents, and similar straight installations. Besides holding the lens, an aluminum channel can keep tape aligned, protect it from casual knocks, and spread heat through a larger structure. It does not guarantee a specific temperature reduction or lifespan increase.
Flexible sleeves suit curved signage, shaped furniture, routed paths, and decorative outlines. Verify which way they bend and whether the route stays within the listed bend limit. Also consider how the sleeve will be inserted, anchored, terminated, and serviced.
A diffuser is not always necessary. In concealed cove lighting, the LEDs may be hidden from normal view while their light reflects from a ceiling or wall. A bare strip can be appropriate if the reflected surface produces the desired appearance and the installation still satisfies the product’s mounting, thermal, electrical, and environmental requirements.
Use a compatibility checklist before ordering
Mechanical fit is just as important as optical performance. Use this checklist for every proposed combination.
Strip and channel
- Measure the actual printed-circuit-board width, not just the seller’s nominal category.
- Compare it with the channel’s usable internal width.
- Leave practical clearance for insertion, solder joints, and manufacturing tolerances.
- Check whether side-emitting components or waterproof coatings make the tape wider or thicker.
- Ensure connectors used inside the profile fit without lifting the lens.
Lens interface
- Confirm whether the diffuser snaps in, slides from an end, adheres to the surface, or presses into a groove.
- Do not assume lenses are interchangeable between brands.
- Check whether the lens must be inserted before the channel is placed against a wall or obstruction.
- Determine whether it can be removed later without damaging the finish.
Profile and installation space
- Verify channel depth, external width, and overall height.
- Allow room for end caps, wire exits, mounting clips, screw heads, and connectors.
- For recessed work, measure the groove’s width and depth as well as the profile flange.
- Check that the flange will cover the cut edge without interfering with adjacent trim.
Length and seams
- Confirm whether ordered lengths arrive as continuous sections or shorter pieces.
- Plan the locations of channel and lens seams.
- Allow for end caps and unusable cut segments.
- Check whether replacement lenses are available separately.
Flexible products
- Verify base width, overall width, height, and tape cavity.
- Confirm the supported bending direction and minimum radius.
- Check how the enclosure is cut and terminated.
- Determine whether the tape can be replaced after installation.
As one product-specific example, the Lille seller lists an approximately 50 mm minimum bend radius. That is a seller specification for this product, not a general limit for flexible diffuser sleeves on the Lille product page.
Finally, inventory the package contents. Identify separately required end caps, clips, connectors, profile, tape, controls, wire, and driver. If cross-brand mechanical fit or optical performance remains uncertain, order a short sample instead of relying solely on nominal dimensions.
Measure, cut, dry-fit, and test before final mounting
A disciplined installation sequence reduces the risk of common fit and service problems.
-
Plan the complete route. Mark the channel location, wire entries, connector positions, end caps, control points, and driver location. Keep the driver accessible and follow its manufacturer’s clearance and ventilation instructions.
-
Measure the actual components. Base the final cut plan on the channel, lens, end caps, and tape in hand—not solely on website dimensions.
-
Dry-fit everything. Place the channel, mounting hardware, diffuser, and end caps in position. Check doors, shelves, trim, and nearby walls. Confirm that the diffuser can still slide or snap into place and can be removed if servicing is expected.
-
Prepare the mounting surface. Where the surface and product permit, clean it with isopropyl alcohol and a lint-free cloth, then allow it to dry. For permanent or mechanically stressed installations, the same tight-space installation guidance recommends screws rather than relying only on adhesive in Wired4Signs’ installation guide.
-
Cut the channel and diffuser. A fine-tooth hacksaw or an aluminum-safe saw blade is commonly used for aluminum profiles. Support the extrusion so it does not deform, and follow the selected product’s instructions for cutting its lens because suitable methods vary by material and shape as outlined by Super Bright LEDs.
-
Remove debris and sharp edges. Clear away metal fragments and plastic debris before inserting the tape or wiring. Follow the profile manufacturer’s handling and finishing instructions.
-
Cut the LED tape correctly. Cut only at the manufacturer’s designated marks or copper-pad locations; cutting elsewhere can interrupt the circuit as explained in Flexfire’s installation guidance.
-
Route and connect wiring. Pass wires through planned openings or end caps before closing the profile. Avoid trapping conductors beneath the diffuser or forcing bulky connectors into inadequate space.
-
Install the tape in the channel. Keep it straight and fully seated. Do not stretch it around corners or place it over debris.
-
Power-test before final mounting. Verify color, brightness, dimming, polarity, controls, and visual uniformity. It is easier to correct a failed joint or mismatched lens before the assembly is permanently installed.
-
Mount the assembly. Use adhesive only where the surface, temperature, load, and product ratings permit. Use the manufacturer’s clips, brackets, or specified fasteners where the installation is overhead, permanent, warm, textured, or mechanically stressed.
For tight-access locations, preassemble the tape and channel before positioning the fixture. In some cases, the diffuser must also be installed first because there will not be enough clearance to slide or snap it in afterward.
This guide covers the low-voltage LED assembly. Follow the equipment instructions and applicable local requirements for the mains-powered side of the driver; LED Lighting Zone likewise limits its installation coverage to low-voltage systems rather than electrical-panel work in its editorial terms.
Troubleshoot hotspots, dim output, loose covers, and moisture risks
Visible dots remain: Diagnose the cause before buying a new lens. Check LED spacing, lens distance, diffuser opacity, viewing distance, and viewing angle. A deeper profile or denser tape may be more effective than a darker cover. Also test different colors and dimming levels because the perceived result can change.
The fixture is too dim: Compare output with and without the lens. If the diffuser causes too much loss, consider a lighter lens paired with denser tape. For task lighting, evaluate illumination on the work surface rather than the brightness of the glowing cover.
The cover is loose, bowed, or lifting: Verify that the lens interface matches the profile. Do not rely on improvised adhesive to correct incompatible mechanical parts.
The tape or channel adhesive is peeling: Check surface preparation, texture, heat, load, and whether the adhesive is rated for the application. Use compatible clips, brackets, or screws where adhesive alone is unreliable.
Long runs look crooked at the joints: Plan seams instead of allowing them to occur wherever stock lengths end. One experience-based technique is to offset channel seams from diffuser seams so the two components bridge one another, producing a straighter-looking run as described in The Hook Up’s installation guide.
The installation may encounter moisture: An ordinary aluminum channel and diffuser are not automatically waterproof, UV-resistant, walk-safe, or approved for wet locations. Environmental suitability must be established for the complete assembly: tape, enclosure, diffuser, end seals, connectors, cable entries, mounting method, and every cut or joint. Guidance for moisture-prone locations likewise calls for compatible rated tape, covers, and sealed channels where required in the tight-space installation guide.
Do not improvise a diffuser from paper, baking paper, or another material unless its heat, fire, and electrical suitability for the exact installation has been established. Although one commercial guide mentions baking paper as a DIY option, it provides no supporting fire or electrical-safety documentation for that use in its diffuser overview.
Frequently asked questions
Do LED strip lights need a diffuser?
No. LED tape can operate without one. A diffuser is most useful when the strip is directly visible, individual LEDs create distracting points, glare needs to be softened, or a finished linear appearance is desired.
A diffuser may be unnecessary when the strip is concealed and aimed at another surface, as in cove or behind-furniture lighting. Even then, a channel may still be useful for alignment, physical protection, mounting, or heat spreading.
Will a diffuser make an LED strip completely dotless?
Not by itself. A dotless appearance depends on LED spacing, channel depth, lens opacity and shape, viewing angle, viewing distance, color, and dimming level.
Sparse tape in a shallow channel may remain visibly dotted even behind a strong diffuser. A deeper profile or denser tape often improves the result more efficiently. Test the intended combination in place before buying a long run.
Is 60 LEDs per meter enough for a smooth light line?
It can be, but there is no universal threshold. Whether 60 LEDs/m looks smooth depends on the channel depth, diffuser design, viewing distance, color, brightness, and required output.
Treat it as a comparison point rather than a guarantee. A shallow profile or clear lens may reveal points, while a deeper assembly and stronger diffuser may conceal them at the cost of useful light.
Can I cut an aluminum channel and its diffuser to length?
Many systems are designed to be cut. Aluminum profiles are commonly cut with a fine-tooth hacksaw or a suitable aluminum-safe saw blade. The appropriate method for the diffuser depends on its material and shape, so follow its product instructions rather than assuming every plastic lens can be cut the same way.
Dry-fit before cutting, account for end caps, support the profile, finish the cut as directed, and remove all fragments before installing the tape.
Can an LED diffuser strip be used outdoors or in a wet area?
Only when the complete assembly is documented as suitable for that environment. A diffuser or ordinary aluminum profile does not make indoor tape waterproof.
Verify the ratings and sealing requirements for the tape, enclosure, lens, end caps, joints, connectors, cable entries, and mounting hardware. Every cut or termination must be handled according to the rated system’s instructions.
Choose the complete system, not just the diffuser
Use a compatibility-first buying sequence:
- Define the desired appearance and required illumination.
- Measure the available installation space.
- Select the appropriate surface, recessed, corner, or flexible profile.
- Choose sufficiently dense LED tape for the viewing conditions.
- Use the least opaque diffuser that produces an acceptable result.
- Verify the mechanical fit, package contents, electrical compatibility, and environmental rating of every component.
- Test a short assembled sample before committing to the full run.
A good LED diffuser strip installation is not simply the darkest available lens placed over any tape. It is a matched system that balances smoothness, usable light, dimensions, serviceability, power demand, and installation conditions. Keep work within your competence and the intended low-voltage system, and refer mains-voltage or code-sensitive work to an appropriately qualified professional.