
Puck Lighting LED: Complete Buying and Installation Guide
LED puck lighting looks simple: choose a compact fixture, attach it beneath a cabinet, and turn it on. In practice, a successful installation depends on the…
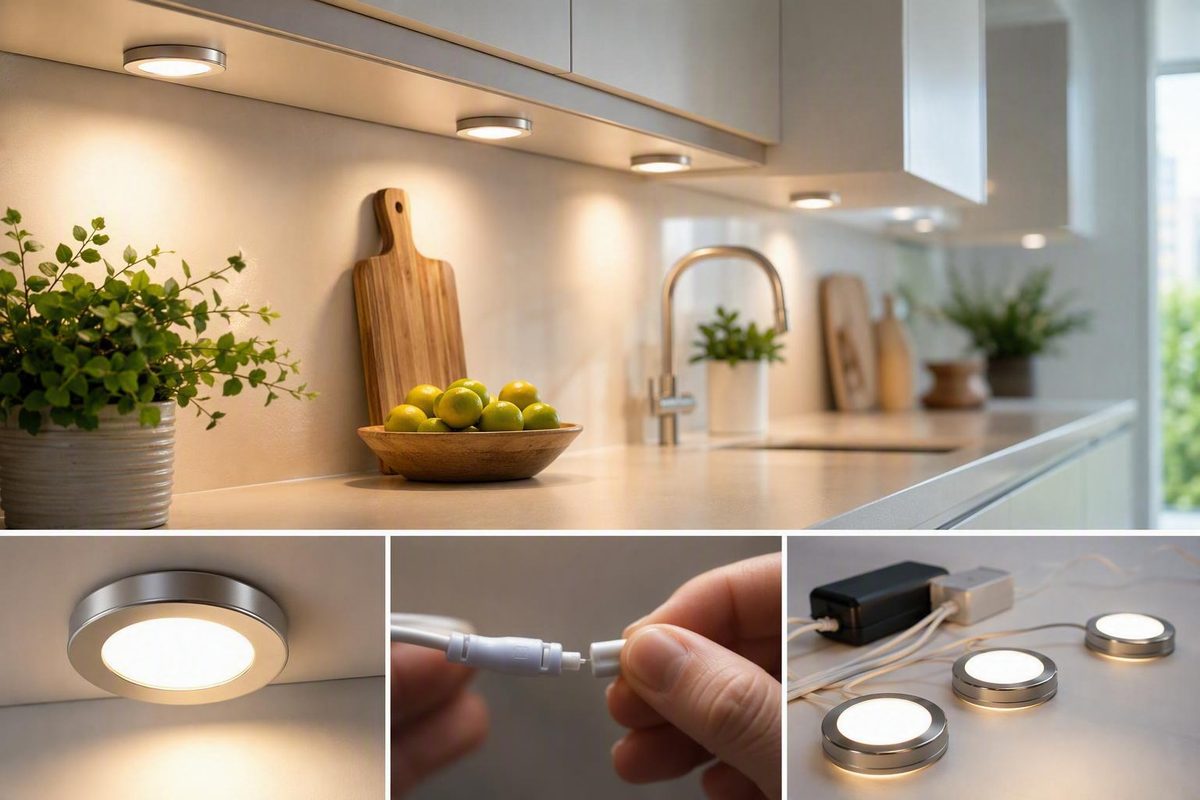
LED puck lighting looks simple: choose a compact fixture, attach it beneath a cabinet, and turn it on. In practice, a successful installation depends on the entire system. The fixture’s beam, output, voltage, driver, connectors, controls, wiring, mounting method, clearances, and location rating all have to agree.
That is why shopping by puck price or diameter alone often causes problems. A puck advertised as “3-inch” may not fit an existing opening.
The first decision is not which product to buy. It is what kind of light pattern the project needs, followed by how the complete system will be powered, mounted, controlled, and serviced.
What LED puck lights do—and where they work best
An LED puck light is a compact fixture used to create focused illumination under or inside cabinets, on shelves, in displays, in niches, and across small work areas. The traditional name comes from the familiar round, hockey-puck-like shape, although the category also includes square, slim, mini, adjustable, swivel, and gimbal designs.
Unlike a strip or linear bar, a row of pucks typically creates separate pools or cones of light. That visual rhythm can be an advantage when the goal is to highlight selected objects or surfaces. Pucks are particularly well suited to:
- Glass-front cabinets
- Open shelving
- Display cases
- Coffee and beverage bars
- Decorative backsplash areas
- Small countertop zones
- Niches and alcoves
- Jewelry or merchandise displays
- Short work surfaces
Adjustable pucks can make the effect more deliberate by directing each beam toward an object or focal point. Fixed pucks are simpler but offer less freedom after installation.
The same focused pattern can become a disadvantage on a long kitchen counter. If the lights are too far apart, the surface may alternate between bright circles and darker gaps. Reflective stone, glossy tile, or glass can make hot spots more obvious. Adding more fixtures may improve overlap, but it also increases the connected load, wiring, hardware, and total cost.
LED strips and linear bars are therefore worth comparing when broad, uninterrupted countertop coverage is the priority. Their longer emitting area generally lends itself to continuous illumination, while puck lighting emphasizes separate areas. A commercial comparison likewise presents pucks as focused accent or display lighting and strips as the option for smoother full-counter coverage (Woodworker Express comparison).
This is a use-case distinction, not a rule that one format is universally better. Closely spaced, well-selected pucks can light a small task area effectively. A poorly selected strip can still produce glare, visible diode dots, or insufficient output.
Quick decision rule: choose LED puck lights when you want focused light, decorative pools, or visual rhythm. Compare strips or bars when the main objective is broad, uniform task lighting across an uninterrupted surface.
Choose the power system before choosing the fixture
Start with four questions:
- Is there an accessible outlet or an existing suitable power connection?
- Is the installation temporary, reversible, or permanent?
- Are visible cords and adapters acceptable?
- Can the cabinets be drilled, cut, or otherwise modified?
Those answers narrow the practical choices before color temperature, finish, or shape enters the discussion.
A practical power decision tree
No outlet nearby and no cabinet modification allowed? Consider battery-powered or rechargeable pucks. These are often the least invasive choices for rentals, temporary displays, and occasional accent lighting.
Outlet available and a cord can be concealed? A plug-in kit is usually the most approachable powered option for DIY installation. Plan the adapter location, switch access, cable route, and storage of excess wire before buying.
Permanent installation desired, with low-voltage wiring possible? Consider 12V or 24V pucks with a compatible plug-in or hardwired power supply. Treat the driver, controls, connectors, and fixtures as one system.
Direct connection to household line voltage desired? Consider only fixtures explicitly designed for that voltage and installation method. This pathway can involve hardwired work and may require an electrician.
Retail assortments show how varied the category is. GE, for example, presents direct-wire, plug-in, and battery-powered families, with surface, recessed, and adhesive mounting represented across different models—not necessarily combined in every product (GE puck-light options).
Battery-powered pucks
Battery pucks avoid fixed wiring and may attach with adhesive, magnets, brackets, or screws, depending on the model. They suit spaces where drilling or cord routing is undesirable, such as rental cabinets, closets, temporary exhibits, and furniture.
The tradeoff is maintenance. Batteries must be replaced, while rechargeable versions must be removed or connected for charging.
Do not infer runtime from package size, ratings, or general marketing language. The supplied evidence does not establish comparative runtime or sustained brightness. Verify the battery type, expected operating time, brightness settings, charging method, and whether output changes as the battery discharges for each exact model.
Rechargeable pucks
Rechargeable products form a separate cord-free category. They may reduce reliance on disposable batteries, but they still impose a charging routine. Check:
- Usable runtime at the intended brightness
- Charging time
- Whether the light must be removed from its mount
- Charging-connector type
- Whether it operates while charging
- Battery replaceability
- Motion-sensor behavior
- Standby drain
Treat all of these as model-specific. “Rechargeable” alone says nothing about how often the fixture will need attention.
Plug-in systems
A plug-in puck system generally uses an outlet-powered adapter or driver. It can be DIY-friendly because it avoids a permanent line-voltage connection, but only if the physical installation works.
Map the route from the outlet to the adapter, control, hub, and each fixture. Confirm cable lengths and decide where extra wire will go. Make sure the wall switch, in-line switch, touch control, or remote receiver will remain accessible after appliances and countertop items return to place.
Low-voltage 12V and 24V systems
A puck marked 12V or 24V requires compatible low-voltage power equipment. The voltage label alone is not enough. You must also match:
- AC or DC output
- Polarity
- Total connected load
- Driver operating range
- Maximum fixture count
- Connector type
- Wiring topology
- Dimming method
- Maximum run length and wire requirements
Never connect a 12V fixture to a 24V supply or assume that any two products carrying the same voltage label can be mixed.
Hardwired and line-voltage systems
Hardwired systems can reduce visible cords and create a permanent result, but they move the project into a different installation category. Other fixtures operate directly at line voltage.
Retail listings include 12V, 24V, and 120V puck-light products, as well as linking components, power cords, and hardwire accessories (examples of multiple voltage pathways). A 120V fixture must not be connected or handled as though it were a 12V or 24V puck. Use a qualified electrician whenever hardwired work is required locally or falls outside your competence.
The specifications that determine light quality and compatibility
Product names are inconsistent. A listing may emphasize “slim,” “bright,” or “dimmable” while omitting the details that determine whether the light will fit and work. Compare products with a fixed checklist instead.
Buyer’s specification checklist
Record the following for every candidate:
- Lumens
- Wattage
- Beam angle
- Fixture diameter, width, and length
- Fixture thickness
- Required cutout size
- Required cavity depth and clearances
- Input voltage
- AC or DC input and output type
- Color temperature
- Color Rendering Index
- Dimming compatibility
- Approved dimmer or control type
- Mounting method
- Dry-, damp-, or wet-location rating
- IP rating, if provided
- Safety listing or certification
- Warranty
- Attached wire length
- Connector type and polarity
- Included driver, hub, cables, controls, and hardware
- Required components sold separately
If a specification is absent, write not reported. Do not estimate beam angle, CRI, flicker, battery runtime, operating temperature, lifespan, or heat performance from photographs or generic LED claims.
Lumens and watts answer different questions
Lumens describe stated light output. Watts describe electrical load. They are related through a particular product’s performance, but one cannot substitute for the other.
Use lumens to compare stated output while remembering that beam shape changes how bright a surface appears. Use watts to calculate connected load and select compatible power equipment. Two pucks with equal wattage can have different lumen ratings, optics, color quality, and distribution.
Beam angle predicts coverage
Beam angle is one of the most useful puck-light specifications because it helps predict the size and overlap of the pools of light. A narrow beam concentrates light and may suit displays. A wider beam may blend more easily across a counter.
Many listings do not report beam angle. When it is missing, ask for a photometric file, beam diagram, or documented angle. If none is available, temporary testing becomes more important. Do not derive an angle from a lifestyle photograph.
Color temperature and color rendering
Approximately 2700K to 3000K produces a warmer appearance, while around 4000K is cooler and is commonly presented for task-oriented settings. Some product families also offer 5000K, selectable-white, or RGB choices (published puck-light color-temperature examples).
CRI deserves attention where food, wood finishes, artwork, fabrics, or merchandise should appear natural. Verify the exact model rather than relying on a collection-wide statement.
Dimming is a system property
A listing that says “dimmable” does not mean the puck works with every driver or wall dimmer. A complete dimming chain can include:
- A dimmable fixture
- A compatible driver
- The correct control method
- Suitable wiring
- An approved dimmer or controller
Use the fixture, driver, and control documentation together. If the documentation does not identify a compatible dimming method, do not assume that the components will work as a complete dimmable system.
How to read a real specification listing
The Apex recessed puck illustrates how dimensions and electrical details work together. Its seller lists it as 12V DC, 2W, 200 lumens, and 3200K, with a 2.85-inch fixture diameter, 0.85-inch thickness, and 2.25-inch required cutout. It is recessed, uses an integrated LED, includes a 6-inch lead, and carries an IP40 rating described as not waterproof (Apex puck specifications).
That listing has several purchasing consequences:
- A separate compatible 12V DC source is required.
- Nominal fixture diameter does not equal cutout size.
- The cabinet needs adequate material and cavity depth.
- The fixture should not be selected for a location requiring waterproof equipment.
Beam angle, CRI, flicker performance, and independently tested thermal performance are not established by the supplied listing and should remain not reported.
Size also affects output and application. In a retailer-produced product presentation, PLT’s 3-inch ultra-thin puck is listed at 2.2W and 150 lumens, while its 1.3-inch mini puck is listed at 1W and 75 lumens; both are identified as 3000K and 12V (PLT product presentation). The smaller fixture may disappear more easily into a display, but it does not provide the same listed output. Neither size should be selected until mounting depth, beam behavior, spacing, and driver compatibility are confirmed.
Surface-mounted versus recessed puck lights
Mounting style affects appearance, installation risk, required tools, replacement access, and cabinet alteration.
Surface-mounted pucks
A surface-mounted puck sits against the cabinet or shelf rather than inside a large cutout. Depending on the exact model, it may use:
- Screws
- A mounting cap or bracket
- Magnets
- Adhesive
- Two-sided tape
This approach generally requires less cabinet modification.
The tradeoff is visibility. A thick puck can be seen from across the room unless the cabinet has a front light rail or trim. Even slim models may look bulky beneath shallow shelving. Attached wires also need a concealed route.
Adhesive mounting avoids screw holes but depends on surface preparation, adhesive suitability, fixture weight, installation conditions, and the cabinet finish. Use only a mounting method approved for the exact fixture rather than adding tape to a screw-mounted product without guidance.
Recessed pucks
A recessed puck sits partly or mostly within a hole in the cabinet, shelf, or display panel. The cleaner appearance comes at the cost of a precise and usually irreversible cut.
Before drilling, verify:
- Cutout diameter
- Overall fixture diameter
- Fixture thickness
- Required cavity depth
- Cabinet material and thickness
- Required clearances
- Wiring route
- Location of fasteners, shelves, drawers, and concealed components
- Access for future removal
- Whether the fixture is approved for the intended mounting condition
Nominal fixture diameter is not the cutout size. The cited Apex fixture is 2.85 inches across but requires a 2.25-inch opening.
A slim fixture may help where depth is limited, and a mini puck can suit a visually discreet display. Still, “slim” and “mini” are marketing descriptions rather than measurements. Check the actual thickness, cutout, lead exit, connector size, and space needed to feed the wiring through the opening.
Fixed versus adjustable light
Fixed pucks hold one beam direction. They are appropriate when fixture position alone can aim the light correctly.
Adjustable, swivel, and gimbal products allow redirection after installation, which is useful in display cases and niches where objects may move. Retailer collections include fixed and adjustable recessed products using several voltage and driver formats (adjustable and fixed puck formats).
Retrofit checklist
Replacing old halogen pucks requires more than measuring the visible trim. Record:
- Existing opening diameter
- Cabinet or shelf thickness
- Available cavity depth
- New fixture diameter and thickness
- Required cutout
- Existing and required voltage
- AC or DC output
- Polarity
- Wire gauge and condition
- Connector format
- Available lead length
- Existing transformer output
- New driver requirements
- Dimming method
- Accessibility of splices and power equipment
Existing wiring may sometimes be retained, but compatibility and condition must be assessed first. Do not assume an old halogen transformer, connector, cable, or opening will suit a new LED puck. Even if the existing wire remains usable, the power supply may need replacement.
Plan placement and spacing before drilling
There is no universal puck spacing because the result changes with:
- Lumen output
- Beam angle
- Mounting height
- Cabinet depth
- Fixture setback
- Countertop color and reflectivity
- Backsplash finish
- Objects and obstructions
- Desired overlap
- Intended use as accent or task light
Published guidance illustrates the variability rather than resolving it. Lowe’s suggests 8–12 inches, Lumaz presents 12–18 inches as a common under-cabinet starting range, and PacLights gives approximately 12–24 inches. These are starting ranges rather than installation requirements (Lowe’s under-cabinet installation guide; Lumaz placement guide).
Test the full layout
Lay the fixtures, hub, controls, driver or adapter, and cables on the countertop. Connect the system according to its instructions and confirm that every lead reaches without tension. Include cabinet partitions, appliance gaps, corner cabinets, and the actual outlet location.
Then temporarily hold or tape the pucks in their intended positions. View the illuminated surface:
- From normal standing height
- From seated positions nearby
- From the room entrance
- With the backsplash and countertop exposed
- With common appliances and objects in place
- At full and dimmed output, if applicable
Look for dark gaps, harsh circles, reflected points, glare from visible LEDs, shadows cast by hands, and cables that cannot be hidden.
Front, center, or rear placement
Toward the front edge: This commonly directs more light onto the usable front portion of the work surface and can reduce the amount concentrated on the backsplash. It may also make the fixture visible from low or seated viewpoints if the cabinet lacks a light rail.
Near the center: This can balance front and rear coverage, but the result depends heavily on beam width and cabinet depth. Hands and countertop objects may still interrupt the light.
Toward the rear: This can emphasize a decorative backsplash, but it may create a bright reflected band on glossy tile while leaving the front of the counter comparatively dim. The user may also cast more shadow onto the work area.
These are likely visual effects, not measured promises. Fixture optics and cabinet geometry can reverse or soften them, which is why temporary testing matters.
A practical layout sequence
- Divide the cabinet run into lighting zones based on use and switching.
- Mark partitions, hinges, shelf supports, outlets, appliances, and other obstructions.
- Choose a tentative front-to-back line for the fixtures.
- Position the end pucks in each zone.
- Distribute intermediate pucks evenly.
- Connect the intended wiring, hub, controls, and power source.
- Test beam overlap from normal viewing positions.
- Adjust spacing or output before drilling.
- Compare the result with a temporary strip or bar if the lights will be primary kitchen task lighting.
- Mark final holes only after fit, cable reach, and light pattern are acceptable.
Pucks set too far apart can leave dark gaps. Moving them closer improves overlap but increases fixture count and load. Excessive output or unsuitable positioning can create glare and pronounced circles rather than useful illumination. Spacing and brightness must therefore be solved together.
Drivers, hubs, wiring, linking, and dimming
A low-voltage puck system is compatible only when every electrical link agrees. For 12V or 24V fixtures, check the power source’s voltage and output type first, then polarity, connector format, load range, fixture-count limit, wire requirements, topology, and dimming method.
Calculate connected load
Multiply the wattage per fixture by the number of fixtures:
5 pucks × 2.2W per puck = 11W connected load
This is the starting calculation, not a complete driver selection. The chosen driver must explicitly support the fixture type, voltage, output, 11W load, intended controls, and fixture quantity. Follow its documented minimum and maximum loads where applicable.
Do not apply a universal driver-headroom percentage. Different systems impose different limits, and some specify a maximum fixture count in addition to wattage.
The PLT system illustrates why both limits matter. Its retailer presentation states that the plug-in adapter supports up to five 2.2W ultra-thin pucks or nine 1W mini pucks, while the hardwired TRIAC driver supports up to six ultra-thin pucks or 12 mini pucks (PLT driver and fixture limits). These are seller-listed limits for that specific product system, not rules for other 12V lights.
Common wiring layouts
Home run or parallel: Each puck, or each small group, returns to a hub or common connection point. This can simplify fixture isolation, but it uses more cable.
T-connection: Individual pucks branch from a common lead. This may reduce the amount of wire returning to one point, but the splice method and branch arrangement must be permitted by the system.
Hybrid: Some branches return to a hub while others connect to a common lead. This can suit divided cabinets when the manufacturer allows it.
Daisy chain: Power travels from one fixture to the next. Use this arrangement only when the product is designed to link that way and the complete run remains within documented limits.
Armacost describes home-run, T-connection, and hybrid arrangements for its own puck products and emphasizes planning around wire length and voltage drop (Armacost wiring guidance). Do not transfer one manufacturer’s splice or wire guidance automatically to another product family.
Voltage drop and wire length
As low-voltage runs become longer and current rises, voltage drop can cause the most distant lights to appear dimmer. The appropriate remedy might involve a different wire gauge, shorter runs, revised topology, redistributed loads, or a different system voltage, but the correct response depends on the product documentation.
Verify maximum run length and wire gauge for the exact system. A universal table is inappropriate when voltage, current, topology, connectors, and driver behavior differ.
Accessories are often separate
A puck listing may include only one fixture. Before checkout, determine whether you also need:
- Driver or plug-in adapter
- Hub or distribution block
- Linking cables
- Extension leads
- Power cord
- Connectors or splice hardware
- Switch
- Sensor or remote receiver
- Dimmer
- Hardwire box or enclosure
- Mounting ring, cap, bracket, or screws
Check whether spare cables, drivers, hubs, and connectors are actually available.
Dimming and mixed loads
Dimming must be designed at system level. The puck, driver, dimmer, control method, and wiring all need to agree. A driver described as TRIAC-dimmable does not establish that an arbitrary low-voltage puck is approved for use with it.
Confirm the combined load, output type, polarity, connectors, control method, wiring limits, and explicit product approval. Nominal voltage is only one part of compatibility.
Installation pathways, location ratings, and safety boundaries
Installation falls into four broad pathways. Each has different tools, risks, and limits.
1. Adhesive battery models
For a simple adhesive battery puck:
- Install the batteries or charge the fixture.
- Turn it on and test the intended location.
- Clean and dry the mounting surface.
- Confirm that the adhesive is suitable for the finish.
- Remove the backing without unnecessarily touching the adhesive.
- Press the mount or fixture into place as instructed.
- Preserve access to the battery compartment, charging port, or removable body.
Do not position the light where opening its battery cover requires prying against the cabinet. If the mount uses a magnetic or twist-off body, test the required removal clearance before attaching it.
2. Surface-mounted plug-in systems
A typical surface-mounted plug-in installation involves:
- Lay out and test all fixtures, cables, controls, hub, and adapter.
- Mark the mounting-cap or bracket holes.
- Check cabinet thickness and concealed obstacles.
- Drill shallow starter holes where the product instructions permit.
- Fasten the mounting cap or bracket.
- Attach the fixture.
- Route fixture leads toward the hub or adapter.
- Mount the hub and control where they remain accessible.
- Secure loose cable without crushing or sharply bending it.
- Store excess lead where it will not interfere with cabinet contents or doors.
Follow the exact kit instructions. Twist-lock, magnetic, clip-in, and screw-mounted designs are not interchangeable.
3. Recessed low-voltage systems
For recessed low-voltage pucks:
- Confirm the required cutout, overall diameter, thickness, and cavity depth.
- Inspect both sides of the mounting area where possible.
- Check for screws, drawer slides, shelf supports, wiring, plumbing, and structural parts.
- Mark the center and verify the layout.
- Use the hole-saw size specified by the fixture manufacturer.
- Feed the low-voltage lead through the opening.
- Connect and secure the fixture as instructed.
- Preserve access to the driver and serviceable connections.
Lowe’s suggests marking cabinet-bottom thickness on the drill bit with painter’s tape as a visual depth cue. That technique does not detect concealed components or replace an inspection of the drilling area.
4. Line-voltage hardwired fixtures
This guide does not provide a universal hardwired procedure. Product instructions and local requirements control the work, and jurisdiction-specific rules can differ.
At a high level, a commercial installation guide describes switching off the relevant circuit, verifying de-energization with a suitable tester, using rated hardware, and enclosing terminations where required. It also states that its steps do not replace product manuals or professional electrical work (hardwired-work scope and precautions).
Use a qualified electrician for panel work and whenever line-voltage or hardwired work is required to be performed professionally or exceeds your ability. LED Lighting Zone’s own terms similarly define its published coverage as informational and low-voltage focused, with panel work directed to an electrician (publication safety scope).
Dry, damp, and wet are not interchangeable
LED technology does not automatically make a fixture suitable near water. Check the exact model’s dry-, damp-, or wet-location listing and any IP rating. The complete installation—including connectors, wiring entries, driver, and controls—must suit the intended location.
The Apex puck discussed earlier is listed as IP40 and explicitly described as not waterproof. By contrast, the seller presentation for the PLT models describes them as ETL rated for damp locations. Neither status applies to puck lights generally, and a damp-location rating is not the same as approval for direct water exposure or wet-location use.
Verify the safety certification on the exact model and packaging. A seller’s statement that most products in a collection are UL or ETL listed does not establish the certification of every fixture, driver, or kit component.
Compare complete systems, not just puck prices
A fixture-only price cannot be compared fairly with a kit containing several pucks, an adapter, hub, switch, cables, and mounting hardware. Normalize the products first.
| Comparison field | Product A | Product B | Product C |
|---|---|---|---|
| Voltage | |||
| Output type: AC or DC | |||
| Watts per fixture | |||
| Lumens per fixture | |||
| Beam angle | |||
| Fixture dimensions | |||
| Required cutout | |||
| Color temperature | |||
| CRI | |||
| Dimming method | |||
| Mounting method | |||
| Location rating | |||
| Safety listing | |||
| Warranty | |||
| Included parts | |||
| Additional required parts | |||
| Package quantity | |||
| Price and date checked | |||
| Installed system total |
Write not reported rather than leaving a critical field ambiguous.
Compare formats, not rankings
Retail catalogs contain individual low-voltage pucks, adjustable fixtures, selectable-CCT products, multi-light kits, battery multipacks, and accessories. These listings demonstrate market variety but do not establish which product performs best.
One undated supplied Lowe’s catalog snapshot displayed a five-pack of battery pucks at $10.98, while other supplied retailer listings showed multi-light or specialty kits above $70. Because the evidence does not provide a reliable capture date, those amounts should not be treated as current prices or a stable market range. Check and record the price, package quantity, promotion, and date yourself before comparing products (Lowe’s puck-light listings).
Armacost’s collection illustrates variation within one family: round or square forms, 12V operation, multiple white color temperatures, low-profile designs, and—in the EdgeVue family—surface or recessed mounting. Those options still require checking output, driver sizing, dimming, included parts, and location suitability for the selected variant (Armacost puck-light collection).
Retailer result totals are also unreliable measures of selection. Category pages can mix fixtures with linking cables, power cords, hardwire boxes, bars, accessories, or misclassified products. A displayed result count does not prove how many distinct LED puck fixtures are available.
Questions the listing must answer
- Is the driver or adapter included?
- What input and output does it provide?
- How many of these exact fixtures does it support?
- Are the hub, connectors, extension cables, and power cord included?
- Is a switch, sensor, remote, or dimmer included?
- Does the complete system dim, and with which approved controls?
- Are mounting brackets, trim rings, screws, or adhesive included?
- What parts must be purchased separately?
- Can failed drivers, fixtures, cables, and connectors be replaced?
- Are replacement components currently available?
- Is the certification and location rating stated for the exact model?
Retailer ratings and reviews can identify issues worth investigating, such as confusing connectors or difficult mounting.
Before checkout, confirm every component:
- Fixtures in the correct quantity
- Compatible power source
- Hub, junction, or distribution components
- Wire and extension cables
- Connector type and polarity
- Switch, sensor, remote, or dimmer
- Mounting hardware
- Dry-, damp-, or wet-location suitability
- Required safety listing
- Cutout tools and installation supplies
- Responsibility for low-voltage and line-voltage work
Five-step buying summary
- Define the lighting goal: focused accent light or broad task coverage.
- Choose the power and mounting pathway: battery, rechargeable, plug-in, low-voltage wired, or line voltage; surface-mounted or recessed.
- Verify the fixture: dimensions, cutout, output, beam, color quality, controls, and location rating.
- Design one compatible system: driver, load, wiring, connectors, hubs, controls, and accessories.
- Test the complete layout before drilling: inspect coverage, glare, shadows, hot spots, cable reach, and service access.
A modestly priced puck can become an unsuitable or expensive choice when its driver, cutout, beam pattern, connector, dimmer, or environmental rating does not match the project. Selecting the complete system first prevents the fixture from becoming the least important—and most misleading—part of the purchase.
Frequently asked questions
Do LED puck lights need a transformer or driver?
Low-voltage pucks generally need a compatible power supply or LED driver that provides the voltage and output type required by the fixtures. Battery models contain their own power source, plug-in kits may include an adapter, and fixtures designed for household line voltage follow a different pathway.
Do not choose a driver by voltage alone. Confirm AC or DC output, polarity, connected load, supported fixture count, connectors, wiring limits, and dimming method. Some sellers use “transformer” informally, so identify the exact required device from the fixture documentation.
How far apart should LED puck lights be placed under cabinets?
There is no universal spacing. Published recommendations vary because output, beam angle, mounting height, cabinet depth, surface reflectivity, and desired overlap affect the result.
Start with the fixture manufacturer’s recommendation, then test the actual lights before drilling. Move the pucks closer if dark gaps remain. If the result becomes a row of glaring circles, reconsider output, aiming, setback, or fixture type rather than relying on spacing alone.
Are puck lights or LED strips better for kitchen countertops?
Pucks are a strong choice for focused pools of light, short work zones, displays, glass cabinets, coffee bars, and decorative rhythm. Strips or linear bars are often easier to use when the goal is smooth illumination across a long countertop.
Neither format is always better. Compare temporary layouts in the actual kitchen. If the pucks leave dark gaps or pronounced hot spots at an acceptable fixture count, a strip or bar may better serve as the primary task light. Pucks can still be used separately for accents.
Can LED puck lights be installed near a sink or in a bathroom?
Only when the exact fixture and all relevant system components are listed or rated for the intended location and exposure. “LED” does not mean waterproof, and a damp-location rating does not automatically authorize direct spray, saturation, or wet-location use.
Check the model’s location listing, IP rating where provided, installation instructions, required clearances, and the ratings of the connectors, driver, and controls. Do not generalize one product’s rating to another puck or to the complete system.
When should an electrician install puck lighting?
Use a qualified electrician for panel work and whenever local requirements call for professional line-voltage or hardwired installation. An electrician is also the appropriate choice when the project involves uncertain existing wiring, damaged conductors, new line-voltage connections, or work beyond the installer’s ability.
Adhesive battery pucks and many plug-in kits are simpler DIY projects. Some wired low-voltage systems may also be approachable when their instructions are clear and a suitable power connection is already provided. The boundary is not the size of the fixture; it is the voltage, wiring scope, local requirements, and installer’s ability to verify a safe, compatible system.