
Outdoor Hanging Light Fixtures: Complete Buying Guide
Outdoor hanging light fixtures are easy to shop by appearance—and easy to buy incorrectly. A lantern may appear in an outdoor-lighting category yet be rated…
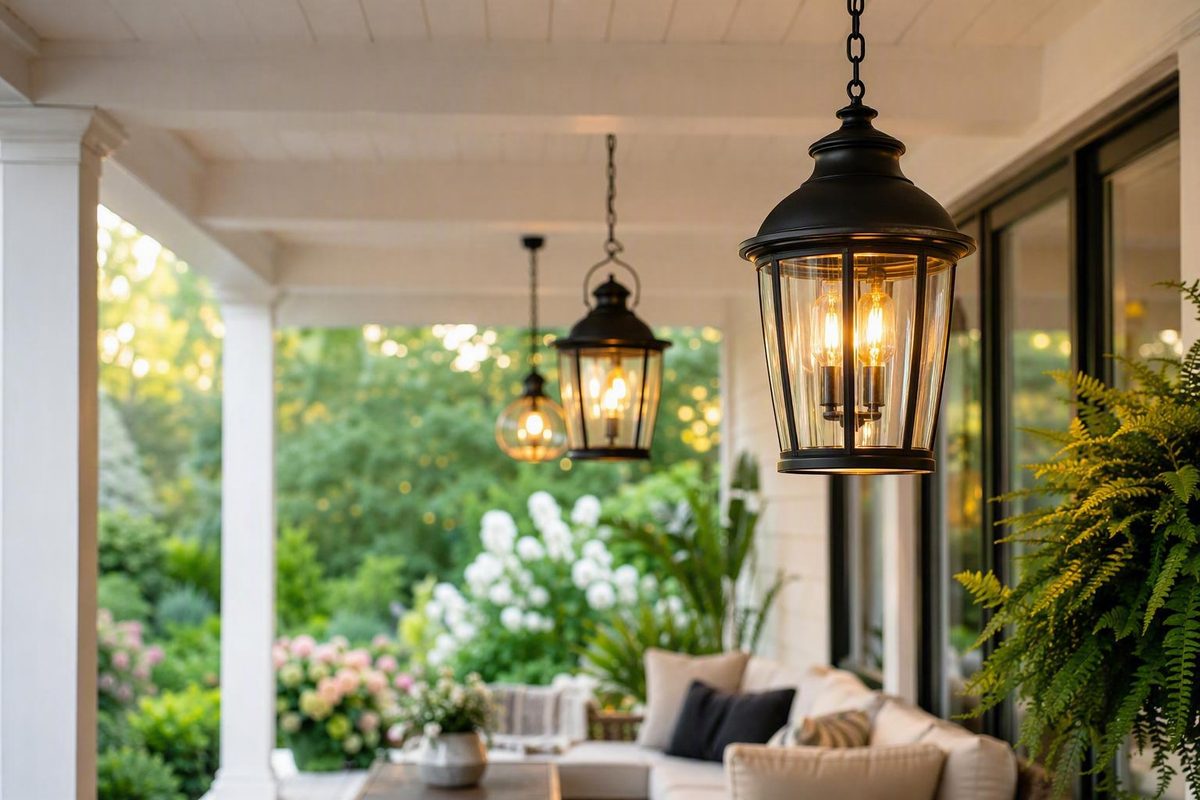
Outdoor hanging light fixtures are easy to shop by appearance—and easy to buy incorrectly. A lantern may appear in an outdoor-lighting category yet be rated only for a protected ceiling. A chandelier may look proportional in a product photo but interfere with a door or walking route.
Use this buying sequence:
- Match the documented location rating to the fixture’s actual exposure.
- Explore a fixture type that suits the ceiling, wind exposure, and lighting role.
- Measure the ceiling, door, furniture, and clearances.
- Before shortlisting, confirm structural support, electrical fit, and mounting compatibility.
- Compare light output, serviceability, controls, materials, style, and price among the candidates that remain.
This is a shopping and planning framework, not a substitute for model-specific instructions, an installation assessment, or local requirements. Retailer and manufacturer guides can help with selection, but they do not establish what is permitted or suitable in every jurisdiction or building.
Start With the Location: Covered Does Not Always Mean Dry
Begin by standing beneath the proposed mounting point during bad weather—not just on a calm day. Consider the roof depth, open sides, prevailing wind, runoff, drifting snow, irrigation, condensation, humidity, and salt exposure.
Use this exposure decision tree:
- Fully protected porch with no realistic direct water contact: Begin with fixtures documented for damp locations.
- Covered but open-sided patio: If wind-driven rain, snow, or hail can reach the ceiling area, begin with wet-location fixtures.
- Open pergola: Treat the location as exposed unless the actual installation provides protection and the model documentation confirms suitability.
- Exposed entry: Require documented wet-location suitability.
- Humid or coastal site: Determine damp- or wet-location suitability from water exposure first. Then separately evaluate corrosion-related construction, coatings, fasteners, seals, restrictions, and warranty exclusions.
Commercial guidance describes damp-rated fixtures as appropriate for protected areas without direct water contact and wet-rated fixtures as appropriate where precipitation can reach the fixture, including some partially covered patios exposed to wind-driven weather (1-800Lighting’s patio pendant guide). A separate exterior-design guide states that dry-rated fixtures are not suitable for outdoor spaces (Room for Tuesday’s exterior-lighting guide).
Why a roof is not enough
“Covered” describes what is overhead. It does not establish what can enter from the sides. A deep porch enclosed on three sides differs from a shallow roof over an open patio. A fixture near the outer edge of a roof may also receive more wind-driven precipitation than one close to the house wall.
Therefore, a covered porch is not automatically a damp-location application. If rain, snow, or hail can realistically reach the fixture, look for a model expressly documented for wet-location use.
Do not substitute marketing language for that documentation. Terms such as weatherproof, waterproof, and marine-grade may be seller descriptions, but they do not by themselves establish a fixture’s damp- or wet-location suitability. Check the individual specification sheet, installation instructions, product label, or manufacturer record.
Do not trust the category breadcrumb
An outdoor retail category is a search tool, not proof of suitability. One outdoor hanging-light collection included products filtered as damp-, wet-, and even dry-location models, showing why every candidate must be checked individually (Lamps Expo’s outdoor hanging-light collection).
For every candidate, find and save:
- The model-specific specification sheet
- The installation instructions
- The stated dry-, damp-, or wet-location rating
- The product’s safety-listing information, if supplied
- Restrictions involving orientation, ceiling type, climate, or coastal installation
- Warranty exclusions related to exposure, corrosion, or finish deterioration
- Contact details for resolving unclear specifications
A title, marketplace description, category breadcrumb, or search filter is weaker evidence than documentation tied to the exact model. If you cannot determine which rating or certification record is accepted for your location, ask the manufacturer, installer, or relevant local authority rather than assuming that a generic logo or seller claim settles the question.
Choose the Fixture Type for the Ceiling, Wind, and Lighting Role
“Hanging light” covers several forms:
- Hanging lantern: A framed or enclosed fixture suspended by a chain, cable, or rod. It commonly suits entries, porches, and defined seating areas.
- Pendant: A broad category using a shade, globe, cage, or lantern-like body to provide ambient or concentrated zone lighting.
- Outdoor chandelier: A multi-arm or multi-light fixture with greater visual scale, often used above a large table or broad covered living area.
- Flush or low-profile ceiling light: A fixture mounted close to the ceiling. It is the practical alternative where suspension, movement, or headroom is a concern.
Catalogs include one- and multi-light versions of these formats, from compact pendants to large chandeliers. That breadth confirms the available choice; it does not show that the products offer equivalent output, weather resistance, or installation suitability.
Fixture-type scenario matrix
| Location or task | Good starting format | Why | Main caution |
|---|---|---|---|
| Entry porch | Hanging lantern or pendant | Creates a focal point and illuminates the entry zone | Check door swing, headroom, and side-driven rain |
| Outdoor dining table | Pendant or chandelier | Defines the table and places light near the activity | Check sightlines, glare, wind, and table position |
| Seating zone | Pendant or small chandelier | Creates a visual center and an ambient pool | One overhead source may leave the perimeter dark |
| Broad covered patio | Multi-light chandelier or layered pendant plan | Provides greater visual scale | Confirm weight, coverage, controls, and support before shortlisting |
| Low ceiling | Flush or low-profile fixture | Preserves headroom | Verify that its distribution suits the intended task |
| Wind-prone covered area | Flush fixture or short, documented suspension | Limits the amount of hanging movement | Do not infer wind suitability from a chain or rod |
Retailer guidance recommends flush fixtures where ceiling clearance or wind makes a pendant impractical and uses hanging fixtures to define dining or seating areas (One Kings Lane’s outdoor-lighting guide). Treat that as design guidance rather than a manufacturer-approved wind limit.
One light versus several lights
Do not equate lamp count with brightness. Useful illumination also depends on:
- Documented lumen output
- The output of the selected bulbs or LED module
- Shade and glass coverage
- Optics and direction
- Mounting height
- Fixture spacing
- Nearby surface reflectance
- Dirt accumulation
- Control settings
Instead of asking one central fixture to perform every job, consider a layered plan using wall sconces, task lights, post lights, step lights, or landscape lighting.
Keep permanent hardwired fixtures separate from decorative string lights. Advice about guide wires, hooks, extension cords, and attachment spacing applies to those products—not to pendants or chandeliers with different electrical and structural requirements.
Fixture-type selection at this stage is exploratory. Do not place a model on the final shortlist until its weight, mounting method, dimensions, voltage, location rating, and ceiling compatibility have also passed the technical audit later in this guide.
Measure Before Ordering: Width, Drop, Door Swing, and Headroom
Measure the space before browsing deeply. Product photography rarely communicates total drop, canopy size, chain length, or the relationship between a fixture and an opening door.
Measurement worksheet
| Measurement | Your value | What to compare |
|---|---|---|
| Finished floor or ground to ceiling | Available vertical envelope | |
| Fixture body height | Product drawing | |
| Fixture width or diameter | Door, table, and room proportions | |
| Canopy depth and diameter | Ceiling surface and junction-box area | |
| Minimum canopy-to-bottom drop | Headroom and door clearance | |
| Maximum canopy-to-bottom drop | High-ceiling proportion | |
| Adjustable chain, cable, or rod range | Required final drop | |
| Adjustment increments | Whether the exact drop can be achieved | |
| Walking-path boundaries | Areas requiring overhead clearance | |
| Table height and width | Centering and table clearance | |
| Door height | Visual scale | |
| Door swing and arc | Physical interference | |
| Distance to fans, beams, and nearby lights | Spacing and visual balance | |
| Fixture weight | Mounting and structural review |
Do not confuse fixture-body height with total installed height. A lantern with a suitable diameter can still obstruct a door or pedestrian route if its shortest possible drop is too long.
Walking routes and dining tables
Where people pass underneath, approximately 7 feet from the ground to the fixture bottom is a useful initial planning rule. Above an outdoor dining table, approximately 32 inches from the tabletop to the fixture bottom is another starting point. These are retailer design recommendations, not universal requirements, and must yield to product instructions, local requirements, user height, sightlines, glare, ceiling height, and site conditions (One Kings Lane’s placement guidance).
Make a full-size cardboard silhouette and suspend it temporarily at the proposed height. Walk beneath it, sit at the table, look across it, and open every nearby door. A mock-up can reveal interference and visual-scale problems that isolated dimensions do not.
Door and room formulas are starting points
One retailer sizing guide suggests that a pendant above a door be approximately one-fifth of the door height, centered, with its bottom at least 6 inches above the door. It also proposes estimating fixture width for a covered space by adding the room’s length and width in feet and reading the sum as inches (Flyachilles’ outdoor-light sizing guide).
Using that room formula:
- A 6-by-6-foot area: 6 + 6 = a 12-inch fixture
- An 8-by-10-foot area: 8 + 10 = an 18-inch fixture
- A 10-by-12-foot area: 10 + 12 = a 22-inch fixture
These are nonbinding design formulas. Other commercial guidance suggests broader entry-fixture proportions of approximately one-quarter to one-third of door height, although that recommendation addresses entry lights generally rather than hanging pendants alone (Kichler’s outdoor-placement guide).
When formulas disagree, prioritize:
- Actual physical clearance
- Total installed drop
- Fixture-body height and width
- Door swing and furniture position
- Sightlines from standing and seated positions
- Ceiling height
- Nearby fixtures
- Viewing distance and visual weight
Before ordering—especially when considering a chandelier or long chain-hung model—compare every measurement with the model’s dimensional drawing. Confirm whether the published overall height is fixed, adjustable, or dependent on optional rods or chain.
Plan the Light: Output, Color, Glass, and Layering
Start with the job rather than the bulb shape. Decide whether the fixture will provide:
- General illumination for the covered area
- Dining or task light over a defined surface
- Decorative ambiance
- Entry-zone lighting
- One layer within a broader exterior plan
The intended role determines whether you need broad distribution, concentrated light, dimming, several fixtures, or support from other fixture types.
Shop by lumens, not bulb count
Lamp count tells you how many light sources a fixture accepts, not how much useful light will reach the space. Check documented lumens when available. Retail catalogs offer many lumen ranges, but those filters do not establish a universal target for every porch, patio, entry, or pergola (Home Depot’s outdoor pendant category).
For socket-based fixtures, calculate the proposed total from the actual bulbs while respecting the model’s bulb requirements and maximum wattage. For integrated LEDs, look for fixture-level lumen output rather than a vague equivalency claim.
Then consider distribution.
Choose color temperature by purpose and preference
Outdoor catalogs include warm white, soft white, bright white, variable white, and customizable options. The available range does not establish one correct color temperature for every location.
Consider:
- Adjacent interior lighting visible through windows
- Whether the area is used for dining, conversation, navigation, or detailed tasks
- How masonry, wood, finishes, and plants appear under the light
- Whether nearby exterior fixtures should match
- Whether dimming or adjustable color is useful
- Whether replacement lamps or modules can maintain a consistent appearance across several fixtures
If consistency matters, compare documented color temperature rather than descriptions such as “warm glow.”
What the glass changes
Common treatments include:
- Clear glass: Exposes the lamp and internal structure. The visible source may appear prominent at eye level.
- Seeded glass: Adds bubbles or irregular texture and changes the appearance of the source.
- Hammered or water glass: Distorts the view through the panel and produces a more active decorative effect.
- Etched, tinted, or other textured glass: Softens or colors the visual impression.
Vendor guidance suggests that tinted or decorative glass and smaller transparent areas may reduce emitted brightness, but this is qualitative guidance rather than a quantified photometric rule (American Gas Lamp Works’ selection guide).
Evaluate the fixture from expected viewpoints: standing at the door, sitting at the table, approaching along the walkway, and looking through nearby windows. If the visible source seems uncomfortable, compare lower output, dimming, diffusion, shielding, a different mounting height, or several lower-output fixtures.
Where light trespass or Dark Sky performance matters, direct light only where needed and ask for documented fixture performance or an applicable approval record. Do not treat a retailer filter or seller tag as proof of certification.
Integrated LED or Replaceable Bulb? Compare Serviceability First
Both integrated-LED and replaceable-bulb fixtures are widely represented in outdoor-lighting catalogs. Listings also include socketed products described as LED-compatible and assortments labeled for incandescent or halogen lamps. Technology alone does not determine which fixture is the better purchase.
Start with one question: What can be replaced if the light source or a related component fails?
Serviceability comparison
| Issue | Replaceable-bulb fixture | Integrated-LED fixture |
|---|---|---|
| Routine light-source replacement | Usually replace the bulb | Check whether the light engine is replaceable |
| Changing color temperature later | Often possible by changing bulbs | Possible only if the fixture is adjustable or supports replacement components |
| Component service | Confirm access to the socket and controls | Ask whether the module or driver can be serviced or replaced |
| Matching several fixtures later | Bulbs may be replaced as a group | Ask about replacement-part availability and matching specifications |
| Maximum output | Governed by socket, enclosure, and wattage requirements | Defined by the documented light engine |
| Failure planning | Usually centers on the bulb, socket, or control | Ask what the warranty covers and whether the fixture must be replaced |
For a socketed model, verify:
- Bulb base
- Maximum wattage
- Bulb dimensions
- Whether a bulb is included
- Permitted lamp types
- Whether the selected LED bulb is suitable for the enclosure
- Damp- or wet-location suitability where applicable
- Documented compatibility with the intended dimmer, sensor, timer, or photocell
For an integrated model, verify:
- Fixture lumens
- Color temperature and available adjustments
- Voltage
- Dimming method and compatible controls
- LED-module and driver specifications
- Whether components are replaceable
- Replacement-part terms and availability
- Warranty duration and covered components
Do not assume a universal lifespan or lower lifetime cost for an integrated LED. Compare the model’s documented specifications, service terms, and warranty instead.
Controls are a system
Check the exact fixture, lamp, and control documentation before purchase.
In particular, ask:
- Does a photocell-equipped fixture permit the intended bulb type?
- Does the integrated LED require a named dimming method or compatible-control list?
- Does a timer or motion sensor specify load requirements?
- Is the selected LED bulb approved for the fixture’s enclosure?
- Will the bulb physically fit behind the glass or shade?
- Does the manufacturer document the proposed combination?
Dusk-to-dawn sensors, adjustable chains, dimming, and sloped-ceiling mounting are commonly advertised features. Treat each as model-specific until the installation instructions confirm it.
Select Materials and Finishes for the Actual Climate
Black and bronze are prominent in sampled catalogs, while brass, copper, nickel, white, and other finishes are also available. Commonly listed body materials include steel, stainless steel, aluminum, iron, and composite. Popularity and appearance do not establish corrosion resistance.
Separate two questions:
- Does the material and finish suit the building?
- Is the complete fixture documented for the site conditions?
Inspect the complete assembly
For humid, rainy, snowy, high-UV, or coastal locations, review more than the main body:
- Base metal or composite
- Finish and coating system
- Canopy
- Chain, cable, or rods
- Connectors and swivels
- Screws, nuts, and other fasteners
- Socket materials
- Glass retainers
- Gaskets and seals
- Drainage details
- LED-module or driver enclosure
- Sensor housing
- Climate restrictions
- Warranty exclusions
A stainless-steel component does not establish that the entire fixture is suitable for a coastal site. A copper appearance may also be a finish over another base material. Request model-specific construction information.
Treat marine-grade, waterproof, and weatherproof as seller descriptions unless the manufacturer defines the term and supports it with relevant documentation or testing. They are not automatic substitutes for a documented wet-location rating.
Absorbent and composite materials
Commercial patio guidance identifies untreated wood and fabric as unsuitable where repeated wetting can occur. Woven shades marketed as weatherproof still require product-specific exposure and care instructions.
Composite materials also require model-level evaluation. Kichler describes UV- and corrosion-related properties for its named Climates collection; those claims apply to that collection, not to every composite fixture.
Glass and cleaning access
Textured glass changes how residue appears but may have detailed surfaces that require different cleaning access. Elaborate cages and multi-panel lanterns also create more edges and fasteners to reach.
Treat these as maintenance considerations rather than guaranteed performance differences. Before buying, determine:
- Whether the glass opens without removing the fixture
- Whether the bulb can be replaced from below
- Whether the access fasteners are captive
- Whether the fixture can be reached safely for service
- Whether replacement glass is sold
- Whether cleaning or opening the fixture affects seals or warranty terms
Coordinate the finish with the architecture, door hardware, roof details, and nearby sconces. No finish is universally best for a particular style or climate.
Verify Mounting, Electrical Fit, and Controls Before Checkout
A hardwired outdoor fixture must fit the ceiling geometrically, electrically, and structurally. A product can pass the appearance test and still fail one of those checks.
This section is a pre-purchase audit, not an installation procedure.
Pre-purchase technical audit
For each finalist, confirm:
- Location: Documented damp- or wet-location suitability for the real exposure
- Electrical: Voltage and stated supply requirements
- Dimensions: Body size, canopy size, minimum drop, maximum drop, and adjustment increments
- Weight: Complete installed fixture weight
- Mounting: Included plate, crossbar, hardware, chain, rods, connectors, and canopy
- Ceiling: Flat- or sloped-ceiling compatibility and any permitted angle
- Support: Manufacturer-stated mounting requirements and any need for installation assessment
- Light source: Bulb base and dimensions, maximum wattage, or integrated-LED specifications
- Output: Documented lumens and color temperature
- Controls: Dimming, photocell, sensor, timer, or smart-control compatibility
- Listing: Model-specific safety-listing information supplied by the manufacturer
- Environment: Temperature, orientation, coastal, or other installation restrictions
- Service: Replaceable components, warranty, and support process
- Purchase terms: Return period, restocking conditions, and packaging requirements
Do not infer mounting suitability from the presence of an existing light. The fixture’s weight, mounting hardware, ceiling construction, existing box, and supporting structure are matters to identify and have evaluated before installation. Retailer patio guidance likewise advises checking that the ceiling or covered structure can support the selected fixture (1-800Lighting’s patio pendant guide).
A chain or rod alone does not establish suitability for a windy location. Follow the model instructions and obtain qualified assessment where the conditions are uncertain.
Know where DIY stops
Hardwired outdoor hanging lights involve line voltage in an exterior setting. One retailer guide recommends electrician or contractor installation for pendants, flush lights, and sconces.
LED Lighting Zone’s terms state that line-voltage work is licensed work in most places and that work at the electrical panel belongs to an electrician (LED Lighting Zone’s electrical-work notice). This is general guidance rather than jurisdiction-specific legal advice.
Use a qualified electrician or appropriately licensed contractor where required and whenever the existing wiring, grounding, box, support, controls, or local rules are unclear. Manufacturer instructions and applicable local requirements take precedence over every sizing and placement rule of thumb in this guide.
Do not transfer advice about extension cords, guide wires, hook spacing, or string-light fasteners to permanent hardwired pendants and chandeliers.
Discounted, discontinued, returned, and open-box fixtures
A lower price may come with missing or difficult-to-replace parts. Before checkout, confirm that the package includes:
- All glass panels or shades
- Canopy
- Mounting plate or crossbar
- Chain, cable, or rods
- Loops, swivels, and connectors
- Fasteners and decorative hardware
- Gaskets and seals
- Installation instructions
- LED module or proprietary components
- Warranty eligibility
- Return rights if parts are missing or the fixture does not fit
Photograph the contents while unpacking, and retain the packaging until completeness and fit have been confirmed.
Save-or-print buying checklist
- [ ] I mapped realistic rain, snow, humidity, wind, and salt exposure.
- [ ] I found the exact model’s damp- or wet-location documentation.
- [ ] I did not rely on “outdoor,” “weatherproof,” “waterproof,” or “marine-grade” alone.
- [ ] I saved the specification sheet and installation instructions.
- [ ] I recorded ceiling height, fixture width, body height, canopy size, and total drop.
- [ ] I checked walking clearance, table clearance, sightlines, and glare.
- [ ] I traced the complete door swing.
- [ ] I checked spacing from fans, beams, sconces, and other fixtures.
- [ ] I verified fixture weight and manufacturer mounting requirements.
- [ ] I confirmed flat- or sloped-ceiling compatibility.
- [ ] I arranged evaluation of the existing box and supporting structure where needed.
- [ ] I verified voltage, bulb base, bulb dimensions, lamp type, and maximum wattage.
- [ ] For integrated LED, I checked lumens, color temperature, module or driver serviceability, and warranty.
- [ ] I confirmed dimmer, sensor, timer, photocell, or smart-control compatibility.
- [ ] I reviewed climate, orientation, and coastal restrictions.
- [ ] I checked access to the bulb, module, glass, and fasteners.
- [ ] I confirmed that all mounting parts and instructions are included.
- [ ] I reviewed warranty, restocking, and return conditions.
- [ ] I arranged qualified installation where required or where conditions are uncertain.
Compare Style and Budget Without Mistaking Price for Quality
Once candidates have passed the exposure, measurement, mounting, and electrical checks, compare appearance and cost.
The design market is broad. Traditional, transitional, modern, contemporary, coastal, farmhouse, rustic, Craftsman, industrial, vintage, and mid-century-modern styles recur across catalogs. Black and bronze are particularly prominent, while clear and seeded glass are common treatments. Compact one-light pendants coexist with large multi-light statement chandeliers.
In catalog material reviewed on August 29, 2026, displayed prices ranged from below $50 to nearly $3,000. One manufacturer catalog displayed a discontinued fixture at $124.99 and a large model at $2,889.99 (Kichler’s outdoor hanging-light catalog).
A separate retailer catalog displayed a sale-priced one-light lantern below $50 and a large eight-light model near $1,600. This is an illustrative snapshot, not a stable or universal market range.
Prices, coupons, shipping promises, stock, review totals, and catalog counts change. Recheck every purchase-dependent fact immediately before ordering.
Three practical shopping tiers
Basic functional fixture
Look for the correct location rating, suitable dimensions, straightforward construction, and either a replaceable bulb or clearly documented light engine. Prioritize complete specifications, accessible glass, included mounting parts, and understandable warranty terms over decorative complexity.
Feature-rich fixture
This tier may add adjustable suspension, integrated LED, dimming, dusk-to-dawn operation, sloped-ceiling hardware, specialty glass, or a more detailed finish. Verify every feature independently, especially control compatibility and serviceability.
Architectural statement fixture
Large lanterns and outdoor chandeliers add scale through multiple lights, elaborate metalwork, or long suspensions. Apply the same exposure and documentation tests used for a basic fixture, then scrutinize weight, mounting requirements, movement, replacement glass, cleaning access, and installation cost.
Higher price does not establish wet-location suitability, corrosion resistance, reliability, repairability, or better light quality. Price may reflect scale, materials, design complexity, brand positioning, distribution, or finish, but the documentation requirements do not change.
Likewise, “best seller,” staff-pick labels, wishlist totals, and small review samples are merchandising or engagement signals—not independent proof of durability or performance.
The final shortlisting method
Reduce the list in this order:
- Eliminate fixtures with the wrong or undocumented exposure rating.
- Eliminate failures in total drop, width, door swing, walking clearance, or sightlines.
- Eliminate models incompatible with the ceiling, support assessment, voltage, or mounting conditions.
- Eliminate unsuitable or poorly documented light sources and controls.
- Eliminate materials, restrictions, or warranty terms that do not fit the climate.
- Compare serviceability, light quality, style, and price among the survivors.
The defensible buying sequence is simple: map the real exposure; require model-specific damp- or wet-location documentation; measure every clearance; confirm mounting and electrical fit before shortlisting; define the lighting role; compare serviceability, controls, and climate documentation; and only then choose by style and price.
Product instructions and local requirements outrank retailer rules of thumb. For hardwired line-voltage work, use qualified help where required or whenever the installation conditions are uncertain.
Can I use a damp-rated hanging light on a covered porch?
Yes, if the mounting position genuinely protects the fixture from direct water contact. Commercial guidance distinguishes protected damp locations from locations where wind-driven precipitation can reach the fixture.
A roof alone does not settle the question. If open sides allow rain, snow, or hail to reach the fixture, choose a model documented for a wet location. Verify the individual model rather than relying on “covered porch” in a title or category.
How high should an outdoor pendant hang over a walkway or dining table?
As initial planning points, allow approximately 7 feet from the ground to the fixture bottom over a walking route or approximately 32 inches from the tabletop to the fixture bottom over an outdoor dining table.
These are not universal requirements. Adjust for ceiling height, user height, sightlines, glare, fixture proportions, wind exposure, and door movement. Product instructions and local requirements take precedence.
Are outdoor hanging light fixtures suitable for sloped ceilings?
Some are, but not all. Look for explicit sloped-ceiling compatibility and verify the permitted angle, canopy design, adapter, and suspension method in the model instructions.
Fixed rods may require a compatible swivel or adapter. Treat any seller title describing sloped-ceiling use as a prompt to inspect the instructions, not as final proof.
Is an integrated LED outdoor fixture better than one with replaceable bulbs?
Not universally.
Compare documented lumen output, color temperature, voltage, dimming requirements, bulb or module specifications, component replaceability, replacement terms, warranty, and the consequences of a failed light source. Choose the format with the clearest service plan for the installation rather than assuming one technology always lasts longer or costs less.
Do I need an electrician to install an outdoor hanging light?
Professional installation is a prudent choice for a hardwired outdoor fixture and may be required by local rules. Retailer guidance recommends electrician or contractor installation for hardwired pendants and related exterior fixtures.
This is especially important where the fixture is heavy, the wiring is damaged or unfamiliar, the mounting point is new, the existing support is uncertain, or work involves the electrical panel. LED Lighting Zone states that line-voltage work is licensed work in most places and that panel work belongs to an electrician (LED Lighting Zone’s electrical-work notice). Check the requirements that apply in your jurisdiction and follow the fixture manufacturer’s instructions.