
LED License Plate Lights: How to Choose
Compare wedge, festoon, and complete assemblies by dimensions, connector, housing clearance, polarity, and bulb-monitoring compatibility.
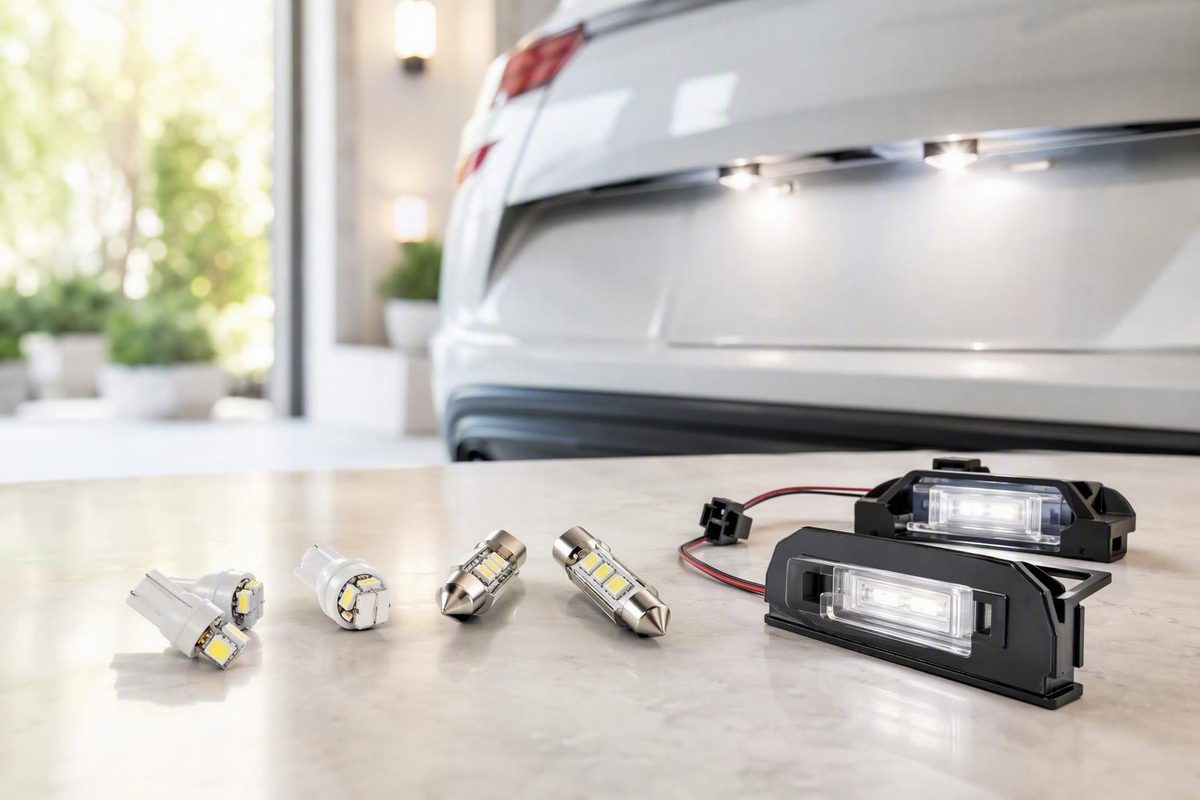
The right LED license plate lights are the ones that match your vehicle’s factory lamp physically, electrically, and optically. First identify whether the original uses a wedge bulb, a festoon bulb, or a complete lamp assembly. Then verify dimensions, connector details, housing clearance, polarity, and bulb-monitoring behavior before comparing brightness.
Favor a reversible installation, keep the original lamps, and do not treat a familiar bulb number or an “error-free” label as proof of compatibility. There is no evidence-supported universal best option: the sensible choice depends on the exact vehicle, lamp position, and factory hardware.
Start here: bulb, festoon, or complete assembly?
Choose the product format before choosing a brand. Your factory lamp determines the sensible starting point.
| Factory setup | Choose this when | Check before buying | Main tradeoff |
|---|---|---|---|
| Wedge replacement bulb | The housing accepts a compatible base such as T10, 168, 194, or 2825 | Base, polarity, overall dimensions, housing depth, light direction, monitoring compatibility | Usually the lowest-cost and most reversible option |
| Festoon replacement bulb | The original bulb is cylindrical with contacts at both ends | Electrical format, exact length, contact shape, diameter, housing clearance | Simple in the correct size; a small length mismatch can prevent secure contact |
| Complete vehicle-specific assembly | An exact year-make-model application and matching connector are documented | Connector, mounting clips, housing shape, seals, configuration, warning-system compatibility | Higher initial price, but component matching may be simpler when the application is exact |
A wedge LED is the logical first choice when the original housing accepts the same base and has room for the LED body and its electronics.
Festoon bulbs require an additional measurement. Seller listings include nominal lengths of 28, 31, 36, 42, and 44 mm, so “festoon” is not a complete fitment description. Match the original bulb’s length and terminal arrangement rather than estimating from a product photograph. The LASFIT license-plate category shows both T10-family and multiple festoon formats.
Consider a complete assembly when the seller documents the exact vehicle application and you prefer a connector-based installation over replacing bulbs individually. It may also be worth trying when replacement bulbs repeatedly upset the vehicle’s monitoring system. That does not mean assemblies are universally easier to install, better sealed, or warning-free.
Neither a shared bulb number nor a vehicle name in a product title proves compatibility with every trim, housing, connector, or electrical circuit. Confirm the factory format first, then decide how much warning-system uncertainty or wiring modification you are prepared to accept.
Verify fitment before comparing brightness
Begin with the owner’s manual, but do not stop there. A manual may identify the replacement bulb without showing the available housing depth, connector shape, or clearance around an LED’s circuit board. Inspecting the original lamp provides those missing physical details.
Use this pre-purchase checklist:
- Exact vehicle: Record the year, make, model, trim, body configuration, and any relevant tailgate or bumper option.
- Factory format: Determine whether the serviceable part is a wedge bulb, festoon bulb, or integrated lamp assembly.
- Bulb number: Read the original bulb or check the manual and parts information.
- Festoon dimensions: Measure the original end to end and compare the terminal shapes.
- Connector: For complete assemblies, compare plug shape, keying, pin count, and wire orientation.
- Polarity: Determine whether the replacement is polarity-sensitive and whether it can safely be reversed in the socket.
- Housing depth: Check the LED’s total length and width, not merely its base.
- Electronic clearance: Leave room for any driver components, circuit board, decoder, or heat sink.
- Mounting details: Compare tabs, spring clips, retained edges, screw locations, and lens outline.
- Electrical monitoring: Look for compatibility documentation covering the exact vehicle and license-plate-light position.
Use a seller’s year-make-model lookup as a cross-check, not the only authority. If the installed lamp differs visibly from the listing, investigate before ordering.
For a complete assembly, require an exact application listing and compare the product photographs with the original connector and mounting features. A seller’s “plug-and-play” description states the intended installation method; it does not independently prove that every listed vehicle configuration uses the same part.
Check the package details as carefully as the fitment. A displayed price may cover one bulb, a pair of bulbs, or one complete assembly. Confirm how many license-plate lamps your vehicle uses and whether the package supplies enough parts. Review the warranty and return conditions before opening sealed packaging or marking the product during a trial installation.
Replacement bulbs versus complete assemblies
| Format and example applications | Captured seller price | Installation and wiring scope | Fitment evidence and important unknowns |
|---|---|---|---|
| T10-family and festoon replacement bulbs | LASFIT: about $9.99–$16.99, with many two-bulb listings | Reuses the factory housing and socket; normally no splice if compatible | Catalog grouping only; clearance, optics, monitoring behavior, quantity, and durability remain vehicle-specific |
| Individual replacement bulbs in several formats | VLEDS: about $8–$40 per bulb | Reuses the factory housing; listed pricing is per bulb | Vehicle selection is available, but not every bulb fits every housing or monitored circuit |
| Vehicle-specific assemblies for selected Ford, Ram, Chevrolet, GMC, and other applications | Morimoto: about $38–$60 | Replaces the complete lamp; marketed as connector-based and plug-and-play | Exact application must match; sealing, warning behavior, output, and installation difficulty are not established by the category page |
| Vehicle-specific assemblies for selected Chevrolet, GMC, Ram, and Ford trucks | Boost Auto: $41.15 on selected listings | Replaces the assembly; marketed as plug-and-play | Limited to listed applications; electrical compatibility and performance descriptions are seller-provided |
These are seller prices captured from the cited category pages, not fixed market prices. Promotions, package quantities, availability, and product revisions can change them.
VLEDS displayed individual bulbs from $8 to $40 and seller-rated outputs from 70 to 600 lumens per bulb, depending on the product. Those output figures are unverified catalog specifications, not directly comparable test results.
The supported tradeoff is limited but useful: replacement bulbs generally have a lower purchase price, while an exact-fit assembly may simplify matching the LED source, lens, connector, and mounting features as one product. There is not enough independent optical, thermal, weather-resistance, vibration, or longevity testing here to rank brands or declare one format universally more reliable.
Why a working LED can trigger a bulb-out warning
Some vehicles monitor a lamp circuit’s electrical behavior to determine whether a bulb has failed. An LED replacement generally presents a different and lower load than the original filament bulb. The LED can illuminate normally while the vehicle interprets that changed behavior as a lamp failure.
Possible symptoms include:
- A dashboard bulb-out warning
- Flickering during operation
- A weak glow or “ghosting”
- Illumination after the ignition is switched off
- Intermittent operation
- Circuit shutdown
These symptoms and the monitoring behavior behind them can vary by vehicle and individual lamp circuit, as this retailer’s CANbus compatibility explanation acknowledges. A vehicle may monitor one exterior-light position strictly while accepting LEDs in another.
CANbus means Controller Area Network bus, the communications network used by vehicle control modules. In this context, however, the practical problem is usually circuit-specific bulb monitoring. Retailers commonly use “CANbus” as broad shorthand for both the vehicle system and an LED’s intended load compatibility.
A “CANbus-compatible,” “CANbus-ready,” or “error-free” bulb contains or uses circuitry intended to make its electrical behavior more acceptable to a monitored circuit. It is not a guarantee. Compact 194/T10 bulbs have limited room for load-matching components, and monitoring thresholds differ among vehicles.
If a warning appears, troubleshoot in this order:
- Confirm that the bulb or assembly is fully seated and that no connector was loosened.
- If the bulb is polarity-sensitive and its design permits reversal, reinstall it in the opposite orientation.
- Verify that the product is documented for the exact vehicle and license-plate-light position—not merely for the same bulb base.
- Try a replacement verified more specifically for that application or an exact-fit connector-based assembly.
- If the fault persists, return to the original lamp or seek vehicle-specific diagnosis.
Treat external load resistors as a last resort. They dissipate electrical power as heat and require a correctly selected resistance, wattage rating, wiring method, and mounting location. General retailer guidance itself warns that sufficient load-matching resistance can be physically large and generate substantial heat, without providing a universal vehicle-specific specification. There is therefore no safe universal resistor value or generic splicing procedure to recommend for license-plate lights.
What the owner reports reveal—and what they do not
Owner accounts can expose failure modes that product listings omit. They are not substitutes for controlled testing, manufacturer instructions, or exact vehicle documentation.
Jeep Renegade case study: One owner documented a conversion on a 2022 Jeep Renegade. Replacement 194/T10 LEDs triggered license-plate bulb warnings. The owner then spliced resistors into the wiring; the installation initially appeared successful but later produced intermittent warnings during nighttime driving. After changing to complete replacement housings, the owner reported bright operation without errors. This Jeep Renegade installation account represents one person’s experience on one documented vehicle, not proof that complete assemblies are generally superior.
Ferrari discussion: A forum thread titled “488 Replacing license plate light bulbs” includes a participant who specifically described performing the work on a 458 Spider. That owner reported a TFT warning after installing LEDs and later restored the original bulbs after a dealer technician could not permanently clear the warning. Another participant also reported accepting a warning after an LED conversion, but the available discussion does not establish a verified model-specific remedy. The Ferrari forum discussion does not prove compatibility—or incompatibility—for every 458, 488, model year, trim, or lamp circuit.
The practical lesson is to record compatibility at the vehicle, model-year, trim, and lamp-position level. “Works in a Jeep,” “worked on a 458 Spider,” or “fits a 194 socket” is not enough to predict behavior elsewhere.
Retain the factory bulbs and avoid irreversible wiring changes until the LED has completed extended testing. A conversion that passes a brief parked check can still produce an intermittent warning once the exterior lights remain active during a drive.
Install carefully, then test during a real nighttime drive
Housing-release methods vary, so consult the vehicle manual or a model-specific service procedure before prying a lens or assembly. A lamp may combine a spring clip on one side with a retained plastic edge on the other. Forcing the wrong edge can damage the retention hardware or prevent the lamp from fitting securely afterward.
The owner reports illustrate this variation. The Jeep account describes releasing the lens from a specific side and removing a gray bulb connector with a twist; the owner also reported bending clips during removal. In the Ferrari discussion, participants describe shifting a spring-loaded housing sideways before lowering the releasable edge, with possible plate removal for clearance. These are model-specific anecdotes, not general removal instructions.
Where the verified procedure permits it:
- Use a plastic trim tool rather than an unprotected metal screwdriver.
- Protect adjacent paint and trim.
- Support the housing instead of pulling on its wires.
- Do not force the lamp when the retention method is unclear.
- Keep seals clean and correctly seated.
- Stop if a connector, clip, or retained edge does not match the expected procedure.
After installation, switch on the exterior lights and check both lamps. Look at the plate rather than directly into the LEDs. The plate face should be suitably illuminated without an obvious dark side, harsh hotspot, or uncontrolled glare. Confirm that each housing is secure and that no connector or seal was displaced.
Then conduct an actual nighttime drive with the exterior lights active. Recheck for dashboard warnings, flicker, intermittent shutdown, and weak glow after switching off the ignition. Also inspect the housing for looseness, deformation, unusual heat, or visible damage.
If a fault persists, reinstall the original lamp before cutting factory wiring or adding an unspecified resistor. A reversible failed trial is an inconvenience; an improvised wiring modification creates a larger electrical and diagnostic problem.
Compliance and the final buying checklist
NHTSA does not approve or endorse individual aftermarket lighting products. Manufacturers are responsible for certifying vehicles and equipment to applicable federal standards, and the use of LED technology alone does not demonstrate compliance. The completed lamp must satisfy the applicable performance requirements, as explained in this NHTSA interpretation of FMVSS No. 108.
That interpretation discusses other regulated lamps, including tail, side-marker, clearance, and identification lamps. It does not establish current license-plate-lamp requirements or determine the legality of any product discussed here. Without current, license-plate-specific primary evidence, seller wording should not be treated as proof that a bulb or assembly is “DOT approved,” “NHTSA approved,” FMVSS compliant, road legal, or legal in every jurisdiction.
Use this checklist before purchasing:
- [ ] Exact year, make, model, trim, and configuration confirmed
- [ ] Factory bulb or assembly format identified
- [ ] Bulb dimensions or festoon length checked
- [ ] Connector and mounting features visually matched
- [ ] Housing depth and LED-electronics clearance checked
- [ ] Package quantity confirmed as one bulb, a pair, or an assembly
- [ ] Monitoring compatibility documented for the exact application where possible
- [ ] Reversible, no-splice installation preferred
- [ ] Seller claims separated from independently tested facts
- [ ] Warranty and return conditions reviewed
- [ ] Original lamps retained
After installation, use a simple pass-or-return test:
- [ ] Both lights operate consistently
- [ ] The plate is suitably illuminated across its face
- [ ] The housings fit securely
- [ ] No dashboard warning appears
- [ ] No flicker, shutdown, or ignition-off glow occurs
- [ ] No unusual heat, deformation, or damage is apparent around the housing
Choose the upgrade only after identifying the factory lamp and checking both housing fit and monitored-circuit compatibility. A reversible bulb or exact-fit assembly with a usable return policy is a better bet than relying on brightness language or an error-free label. If the conversion causes persistent warnings or requires an unspecified heat-producing resistor, returning to the factory lamp is the more dependable result.