
Cabinet Hinge Adjustment by Door Symptom
Clockwise and counterclockwise directions differ by hinge mechanism and how movement is described. Identify the hardware, then test one small movement at a time.
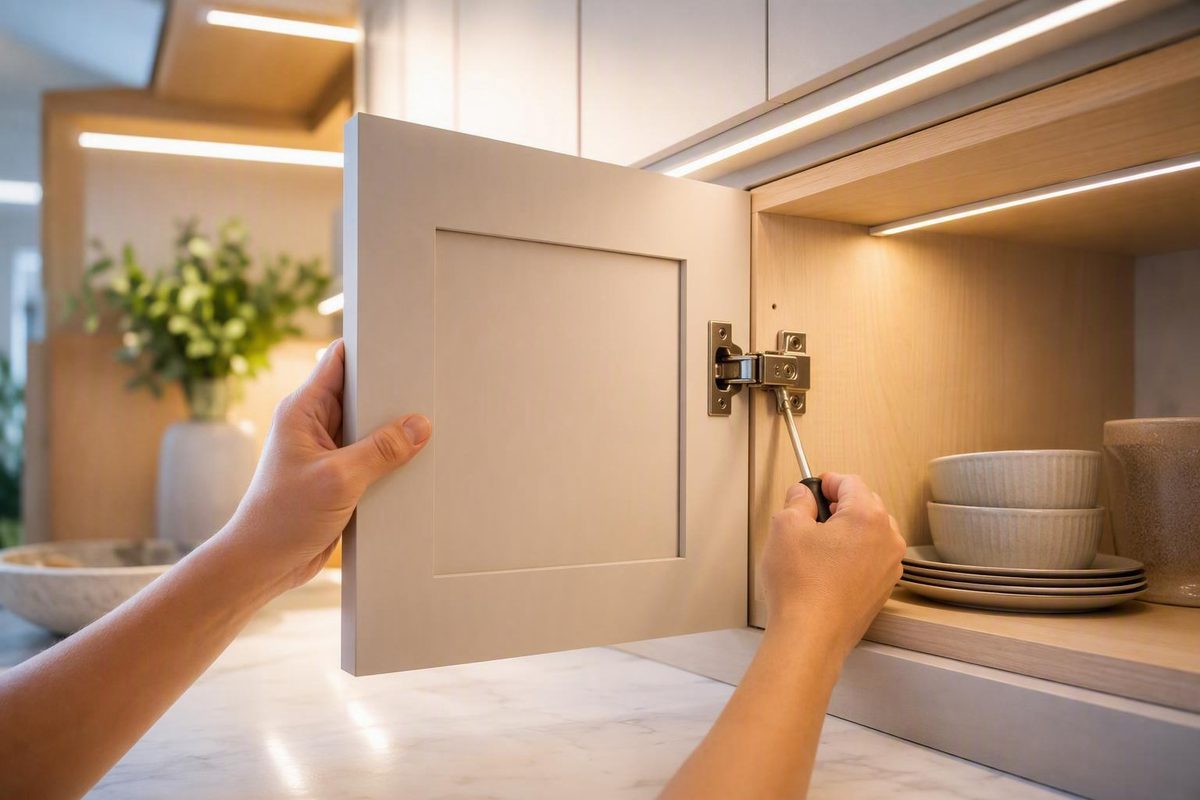
A cabinet door that sags, rubs, overlaps its neighbor, or refuses to sit flush often needs only a careful hinge adjustment. The key is to diagnose the direction of the error before turning a screw.
Many modern concealed hinges provide separate controls for height, side-to-side position, and depth. Screw locations and turning effects vary by model, however. Identify the hardware first, secure anything loose, and adjust one function at a time in small increments.
Quick-start sequence:
- Identify the exact rubbing point or uneven gap.
- Confirm that the hinge has adjustable controls.
- Tighten loose mounting hardware by hand.
- Set the door height.
- Correct side-to-side gaps or tilt.
- Set the door depth.
- Open and close the door several times.
- Stop if hardware, screw holes, or mounting surfaces are damaged.
The detailed three-axis process below applies primarily to concealed or European-style cabinet hinges. Visible surface-mounted, semi-concealed, butt, pie-cut, and other specialty hinges may require different procedures—or may offer little adjustment beyond repositioning or replacing the hardware.
Diagnose the Door Before Turning a Screw
Begin with the door closed naturally. Do not push a crooked corner into place. Look at the door straight on, then from the side, comparing its top edge, bottom edge, surrounding gaps, and front-to-back position with adjacent doors.
Use the symptom to select the likely adjustment:
| What you see | Likely adjustment | What it changes |
|---|---|---|
| The entire door is uniformly too high or too low | Height | Raises or lowers the whole door |
| The door rubs, overlaps another door, or has unequal side gaps | Side to side | Moves the door left or right |
| The closed door projects beyond the cabinet face | Depth | Moves the door inward |
| The closed door sits behind the cabinet face | Depth | Moves the door outward |
| The gap is diagonal or wedge-shaped | Unequal upper and lower hinge correction | Changes the door’s angle |
| Only one corner sits proud or recessed | Depth at the nearest hinge | Brings that corner closer to flush |
Identify the exact contact point before deciding what to change. A door rubbing along its full vertical edge usually needs a whole-door lateral shift. A door touching only at an upper or lower corner is more likely tilted. If two doors share an opening, the apparent error may need to be divided between them.
Other warning signs include:
- Sagging or a visibly low corner
- Scuff marks on the door, frame, or neighboring door
- Scraping, clicking, or creaking
- Uneven perimeter gaps
- Difficult opening or closing
- Failure to remain closed
- A door that stops before reaching the cabinet
- Loose or missing hardware
- A mounting plate that moves when the door is handled
These symptoms locate the problem but do not prove that hinge alignment is the only cause. A stored item, shelf fitting, pull, latch, or neighboring handle may obstruct the door. The cabinet box may also be distorted or out of square.
Use this diagnostic routine:
- Close the door gently.
- Compare its top edge with neighboring doors.
- Compare the side gaps from top to bottom.
- Determine whether each gap is parallel, tapered, or interrupted by a contact point.
- View the door from the side to see whether both corners sit in the intended plane.
- Open the door and check for objects or fittings blocking its path.
- Hold the outer edge lightly and watch for movement at the hinge or mounting plate.
- Inspect the door itself for visible twisting, swelling, or warping.
Do not begin by turning screws at random. General cabinet-manufacturer guidance likewise recommends identifying the hinge and alignment problem before making changes, then testing the door after adjustment (Fabuwood cabinet-hinge adjustment guide).
Identify the Hinge and Its Controls
A concealed or European-style hinge is installed inside the cabinet and is generally hidden when the door is closed. It commonly includes:
- A circular hinge cup recessed into the back of the door
- A hinge arm extending toward the cabinet
- A mounting plate or base attached to the cabinet
- Mounting screws and one or more adjustment controls
Visible face-frame, surface-mounted, semi-concealed, and traditional hinges have different forms. Some can be repositioned by loosening their mounting screws, but they should not be assumed to have the same three-axis controls as concealed hardware.
Many modern concealed hinges provide three kinds of movement:
- Vertical adjustment: changes the door’s height.
- Lateral adjustment: changes its left-right position.
- Depth adjustment: changes how far in or out the closed door sits.
Vertical movement may come from mounting screws passing through slotted or oval holes. With that arrangement, the screws are loosened slightly so the door or hinge assembly can slide up or down. Other hinges use a dedicated mechanical height control.
Lateral and depth controls are commonly located on the hinge arm, but their order and operation vary. A screw near the door on one hinge may perform a different function from a similarly positioned screw on another. A rear screw may control depth, secure the arm, or lock it to the mounting plate.
Look for a brand name, model number, stamped code, or logo. If one hinge is difficult to read, inspect the others on the door. Use a manufacturer diagram when one is available rather than relying on a generic screw map.
The following labeled schematics show common component arrangements. They are identification aids, not universal instructions for which way to turn a control.
Layout 1: Concealed hinge with a slotted mounting plate
DOOR                                              CABINET SIDE
┌────────────────┐
│ Recessed cup   │──── hinge arm ──── mounting plate
└────────────────┘          │              ●
                            │              ║  vertical slot
                     arm controls          ●
                  for lateral/depth     mounting screws

Height: obtained by sliding the plate or assembly in its slots
Lateral/depth: controlled on the arm, with order varying by hinge
Layout 2: Concealed hinge with dedicated adjustment mechanisms
DOOR                                              CABINET SIDE
┌────────────────┐
│ Recessed cup   │──── articulated hinge arm ─── mounting plate
└────────────────┘             │   │                  │
                               │   │                  │
                         lateral/depth          height mechanism
                          control area          or mounting control

The door may be adjusted mechanically without sliding the entire plate.
Control positions must still be verified for the specific hinge.
Layout 3: Compact concealed hinge for a face-frame installation
DOOR                                       CABINET FACE FRAME
┌────────────────┐
│ Recessed cup   │──── compact arm ─────── mounting base
└────────────────┘             │                    │
                         adjustment area       mounting screws


Do not infer a control's function from its position alone.
Concealed hinges used for frameless overlay, frameless inset, face-frame overlay, and face-frame inset installations can all provide three-axis movement while assigning those functions to different controls. A demonstration of these configurations shows why the hardware must be identified before adjustment (Woodshop Diaries concealed-hinge demonstration).
Do not generalize clockwise and counterclockwise directions. Published directions differ because hinge mechanisms differ—and because movement may be described relative to the cabinet rather than the person viewing it. Once you identify a likely control, make a very small test movement, close the door, and observe what happened. Reverse the movement if the door went the wrong way.
Marking the starting position with removable tape or a pencil reference on adjacent metal can provide a useful baseline. If the first change makes the alignment worse, return to the mark before trying another control.
If the hinge has no identifiable adjustment mechanism, do not force its screws. It may need to be repositioned or replaced instead of adjusted with this procedure.
Gather Tools and Prepare the Door Safely
Use a correctly fitting manual screwdriver as the primary tool. A Phillips driver is common, but some hinges may require a flat-head screwdriver or Allen wrench. Select the exact type and size that seats fully in the screw head without wobbling.
Commercial how-to guidance also recommends a manual driver rather than a drill for this reason (Taskrabbit hinge-adjustment instructions).
Optional tools include:
- A small level for comparing door tops
- A measuring tape for checking repeated gaps
- Removable tape or a pencil for marking starting positions
- A flashlight for reading hinge markings
- A folded cloth to protect the cabinet interior
- A helper for a large or heavy door
Clear the cabinet opening before beginning. Remove or reposition cookware, containers, shelf liners, pull-out fittings, and anything else that could interfere with closure. Check that the door pull does not strike an adjacent wall, appliance, or handle.
Open the door and inspect every hinge for:
- Loose or missing mounting screws
- A screw that sits crooked or will not become snug
- A detached or moving mounting plate
- Stripped screw heads or damaged holes
- Bent hinge arms
- Cracks around the hinge cup or mounting area
- Rust, heavy wear, or broken parts
- A hinge cup pulling out of the door
- Different hinge types installed on the same door
Support a large or heavy door before loosening mounting screws. A helper can hold its outer edge so it does not drop, twist the hinges, or pull against a weakened mounting point (Fabuwood cabinet-hinge adjustment guide).
First tighten loose mounting screws by hand. Securing the hardware may restore much of the alignment without changing any adjustment control. Tighten only until snug. If a screw keeps turning without resistance, stop: the problem is the hole or mounting surface, not insufficient torque.
Do not loosen every screw simultaneously. Preserve a stable attachment point so the door remains controlled, and change only one adjustment function at a time. Soft-close hinge guidance specifically warns against loosening all screws at once or forcing a hinge beyond its adjustment range (Würth Louis and Company soft-close hinge guide).
Use the Three-Axis Adjustment Sequence
Use this order:
- Secure loose hardware.
- Set the door height.
- Correct side-to-side gaps.
- Set the depth.
- Perform a complete operational check.
Lateral alignment establishes the side and center gaps. Depth is easiest to judge after the door is positioned correctly in the opening.
Set the height
Use height adjustment when the entire door is uniformly too high or low.
On hinges with slotted mounting plates:
- Open the door and support its outer edge.
- Identify the mounting screws passing through vertical slots or oval holes.
- Loosen those screws only enough to permit controlled movement.
- Move the door or hinge assembly up or down.
- Hold the door at the desired height.
- Retighten the screws by hand.
- Close the door and compare it with neighboring doors.
Some manufacturer instructions use a quarter turn or less as an initial reference when loosening slotted mounting screws. That is not a universal specification; the screws need only enough relief to allow movement. Masterpiece describes slightly loosening the mounting screws, repositioning the door, tightening them by hand, and rechecking the alignment (Masterpiece cabinet adjustment tips).
If the hinge has a verified dedicated height mechanism, use that control instead of sliding the plate. Make a slight change, close the door, and observe the result before adjusting again.
Correct side-to-side position
Use lateral adjustment when:
- A door rubs its neighbor
- Two doors overlap
- A side gap is too wide or narrow
- A paired-door center gap is uneven
- The whole door sits too far left or right
Locate the verified lateral control for the hinge. Turn it only a small amount and close the door. If the door moves in the wrong direction, return toward the baseline and adjust the other way.
To move the entire door sideways without changing its angle, make similar lateral changes at the upper and lower hinges. If the door becomes diagonal, the two hinges have not produced equal movement.
Set the depth
Use depth adjustment when the door is correctly positioned vertically and laterally but does not sit flush.
A door that stands proud may need to move inward, provided nothing is obstructing it. A recessed door or corner may need to move outward. Locate the model-specific in-out control, make a slight movement, and test the door.
Do not attempt to complete the correction with one large turn. Small control movements can produce visible changes at the door edge.
After each adjustment:
- Snug the relevant screw without forcing it.
- Close the door gently.
- Inspect the affected gap or corner.
- Open the door and make another small change only if necessary.
- Stop when the door is aligned, even if more adjustment travel remains.
Worked example: raising a uniformly low door
The top of the door is parallel with the neighboring door but sits lower across its full width.
- Support the door.
- Determine whether height is controlled by slotted mounting holes or a dedicated mechanism.
- Loosen or operate the height controls at both hinges.
- Raise the entire door slightly without tilting it.
- Retighten the mounting screws by hand.
- Close the door and compare both top corners with the neighboring doors.
- Repeat with a smaller change if it remains low.
If only the handle-side corner is low while the hinge-side corner is correct, the door is tilted rather than uniformly low. Correct the angle instead of raising the whole door.
Worked example: shifting a door that rubs along its entire edge
The full vertical edge contacts the neighboring door, while the opposite outer gap is wider.
- Confirm that the hinges are secure.
- Check that neither door is visibly warped.
- Identify the lateral control.
- Make a small, similar adjustment at both hinges to shift the door away from its neighbor.
- Close both doors and inspect the center gap from top to bottom.
- Divide the correction between both doors if moving only one creates an excessive outer gap.
The goal is a balanced pair, not merely eliminating contact by moving the problem elsewhere.
Worked example: bringing one recessed corner flush
The upper corner sits behind the cabinet face, while the lower corner is already flush.
- Check that the door is not obstructed or visibly twisted.
- Identify the depth control on the upper hinge.
- Make a small adjustment intended to bring that hinge area outward.
- Close the door and view both corners from the side.
- Reassess the lower corner before making another change.
If both corners are recessed by the same amount, make similar depth adjustments at both hinges instead of changing only one.
Straighten Crooked Doors and Align Paired Doors
The central rule is:
- Similar changes at both hinges move the whole door.
- Different changes at the upper and lower hinges change its angle.
That distinction prevents a common mistake: trying to correct a diagonal door by shifting both hinges equally.
Move a whole door left or right
If the door is parallel to the cabinet but uniformly misplaced, make small lateral changes at both hinges. Check the full edge after every round.
WHOLE-DOOR LATERAL MOVEMENT

Before:                         After:
Wide outer gap                  More balanced gaps
│       ┌────────┐              │     ┌────────┐
│       │  DOOR  │   ─────▶     │     │  DOOR  │
│       │        │              │     │        │
│       └────────┘              │     └────────┘

Upper hinge: small lateral change
Lower hinge: similar lateral change
Result: the door shifts while remaining approximately parallel
If the upper gap changes more than the lower gap, stop and correct the imbalance rather than continuing to move both controls blindly.
Correct a diagonal or wedge-shaped gap
A crooked door may have a narrow gap at the top and a wide gap at the bottom—or the reverse. It requires unequal or opposing lateral changes at the two hinges.
TILT CORRECTION

Before:                         Goal:
│ ││
│ tapered gap ││ parallel gap
│ ┌────────┐ ││ ┌────────┐
│ \│ DOOR │ ─────▶ ││ │ DOOR │
│    └────────┘                 ││ └────────┘

Upper hinge: small lateral correction
Lower hinge: different, smaller, or opposing correction
Result: the door rotates slightly instead of shifting as one unit
Make one small change, close the door, and identify which corner moved. If necessary, return to the marked baseline and try the other hinge. Do not assume that the upper hinge must always move in a particular direction; the required movement depends on the hardware and visible error.
Correct one corner in depth
If one corner projects or sits recessed while the other is flush, change depth at the hinge nearest the problem corner.
ONE-CORNER DEPTH CORRECTION — SIDE VIEW

Cabinet face:  │
Door before: │\
upper corner projects

Adjust depth at the upper hinge
                 ↓

Door after:    ││  upper and lower corners share the intended plane
After changing one hinge, inspect the opposite corner.
Align paired overlay doors
Paired doors must be treated as one system. Watch four relationships at the same time:
- The center gap
- Alignment of the top edges
- Outer clearances at the cabinet sides
- Rubbing or overlap during closure
Do not perfect one door in isolation if doing so transfers the visual problem to its neighbor. Move one door slightly, close both, and decide whether the second should share the correction.
If the center gap is too narrow but both outer gaps are generous, move each door outward slightly rather than putting the entire correction on one side. If one outer gap is already narrow, more of the correction may need to come from the other door.
Across a cabinet run, compare repeated gaps and neighboring door tops rather than judging each door against one potentially imperfect cabinet edge. Consistency and unobstructed movement are more useful than an unsupported universal measurement.
Adjust Soft-Close Behavior Only After Alignment
Door position and closing behavior are separate issues. Height, lateral, and depth controls determine where the door sits. A soft-close damper or tension mechanism—when present—changes how the door behaves near the end of its closing travel.
Before changing soft-close behavior, correct:
- Rubbing
- Overlap
- Diagonal gaps
- Incorrect height
- Proud or recessed positioning
- Obstructions inside the cabinet
A misaligned door may bind, resist the damper, bounce from a neighboring door, or stop short. Changing damping before correcting alignment can obscure the underlying problem.
Some soft-close hinges have a switch, slider, or dial. Others have fixed damping with no user adjustment. Do not assume that an unfamiliar screw controls closing speed.
Identify the hinge through its markings or model documentation. If an adjustable damper is confirmed:
- Note its starting position.
- Make a small change.
- Close the door normally.
- Repeat the test several times.
- Fine-tune only after the result is consistent.
For a door that slams, cautiously increase the available damping if the mechanism allows it. If excessive damping prevents full closure, cautiously reduce it. Never force a switch, dial, or screw beyond its operating range.
Adjustment may not solve the problem when:
- The hinges are standard rather than soft-close
- One hinge is soft-close and another is not
- Dampers are set inconsistently
- The door remains misaligned
- A spring is worn
- A damper has failed
- The mechanism is obstructed or damaged
Soft-close guidance distinguishes the three alignment axes from damping, notes that some hinges have no adjustable damper, and recommends aligning the door before changing closing behavior (Würth Louis and Company soft-close hinge guide).
Know When Adjustment Is Not the Repair
Stop turning a screw if it spins without becoming snug. More torque will not restore a damaged hole and may enlarge the damage. The mounting surface must be assessed and repaired before it can hold alignment reliably.
A stripped hole requires a repair suited to the cabinet material, hardware, available thickness, hinge load, and extent of damage. A larger screw, anchor, filler, backing plate, shim, or washer is not automatically appropriate in every situation.
Consider replacement assessment when a hinge is:
- Bent
- Cracked
- Rusty enough to impair movement
- Badly worn
- Missing an essential part
- Pulling apart at a pivot
- Non-adjustable and unable to hold the required position
- At the end of its adjustment range without achieving alignment
A worn spring or failed soft-close damper is also a replacement candidate when the door itself is already aligned.
If the door reaches the limit of hinge travel but remains misaligned, investigate the wider installation. Possible causes include:
- An incorrectly positioned mounting plate
- Incompatible hinge and mounting-plate components
- A warped door
- A distorted or out-of-square cabinet
- A damaged hinge-cup recess
- A mounting surface that has shifted
- Hardware intended for a different overlay or door configuration
A door that sticks seasonally may be reacting to humidity.
Stop work when:
- The mounting plate is detached
- The cabinet or door is cracked around the hardware
- The hinge cup is pulling out
- The door sags severely
- A large door cannot be supported safely
- The hinge type or screw function cannot be identified
- Repaired screw holes fail repeatedly
- The cabinet appears structurally distorted
Bent, rusty, damaged, or heavily worn hinges may require replacement when ordinary adjustment no longer works (Fast Cabinet Doors troubleshooting guidance).
A qualified cabinet installer, finish carpenter, or woodworker is the safer choice for structural damage, heavy unsupported doors, repeated mounting failure, uncertain material repairs, or hardware that must be relocated accurately.
Perform the Final Alignment and Operation Check
Do not judge the result from one closure. Open and close the door several times through its normal range, using the handle as you ordinarily would.
Confirm that the door:
- Opens without binding
- Moves smoothly through its swing
- Does not scrape the cabinet
- Does not click, creak, or catch unexpectedly
- Clears its neighboring door
- Closes without being pushed sideways
- Remains in its intended closed position
Inspect the closed door from the front. Gaps should appear visually consistent for the cabinet design, and the top should align with neighboring doors. On paired doors, check the center gap from top to bottom and confirm that neither door overlaps the other.
Then inspect the door from the side. The upper and lower corners should sit in the intended plane. A door can look straight from the front while still projecting at one corner.
For soft-close hardware, cycle the door five to ten times as a practical final test. Confirm that the closing action is repeatable rather than judging it from one unusually fast or slow push.
Recheck the mounting and adjustment screws by hand. They should be snug, not forced. If tightening a mounting screw changes the alignment, support the door, reset its position, and tighten gradually while watching for movement.
Evaluate paired doors together one final time. Correcting one door can make the center gap appear uneven even when neither door rubs. If necessary, divide one final small lateral correction between both doors.
No universal fixed inspection schedule is necessary. Inspect the hinges when looseness, noise, rubbing, or renewed misalignment appears.
Final checklist:
- Secure screws: Mounting and adjustment screws are snug by hand.
- Smooth travel: The door opens and closes without binding or unexpected noise.
- Even gaps: Reveals look consistent with neighboring doors.
- No rubbing: The door clears the cabinet and adjacent doors.
- Flush closure: Upper and lower corners sit in the intended plane.
- Reliable action: The door latches, self-closes, or soft-closes consistently.
The successful workflow is symptom-first: identify the hinge, secure loose hardware, set height, correct lateral position, set depth, and test after every small change. The job is finished when the door has consistent gaps, smooth travel, and flush closure—not when a screw has been forced to the end of its range. Damaged holes, worn hardware, warped doors, and structural cabinet problems require repair or replacement rather than further adjustment.
Which screw adjusts a cabinet door left or right?
On many concealed hinges, the lateral or side-to-side control is on the hinge arm. Its exact position and turning effect vary by model, so identify the hinge and verify the control before adjusting it.
Make a slight test movement, close the door, and observe the direction of travel. To shift the whole door, make similar lateral changes at both hinges. To correct a diagonal gap, make unequal or opposing changes at the upper and lower hinges.
How do I raise a sagging cabinet door?
First tighten any loose mounting screws. If the entire door remains uniformly low, identify its height mechanism.
Many hinges use mounting screws in vertical slots or oval holes. Support the door, loosen the screws only enough to permit movement, raise the door, and retighten them by hand. Other hinges use a dedicated height control.
If only one corner is low, the door is tilted rather than uniformly low. Correct its angle through small, unequal upper and lower hinge changes instead of raising the entire door.
Why does a cabinet door still stick out after I adjust it?
The door may need depth adjustment rather than a height or lateral correction. Verify the hinge’s in-out control and make a small change at both hinges if the entire door projects, or at the nearest hinge if only one corner is proud.
If depth adjustment does not solve the problem, check for an obstruction, warped door, cabinet distortion, bent hinge, incorrect mounting-plate position, incompatible hardware, or exhausted adjustment travel.
Can every soft-close cabinet hinge be adjusted?
No. Some soft-close hinges provide a damper switch, slider, or dial, while others have fixed damping with no user adjustment. Alignment screws do not necessarily control closing speed.
Identify the specific hinge before changing an unfamiliar control. Correct height, gaps, rubbing, and depth first; adjust damping only when the model has a confirmed soft-close control.
When should I replace a cabinet hinge instead of adjusting it?
Consider replacement when the hinge is bent, cracked, heavily rusted, badly worn, non-adjustable, or unable to hold alignment. A worn spring or failed soft-close damper may also require replacement when the door position is otherwise correct.
A new hinge alone will not correct a spinning mounting screw, detached plate, cracked cabinet, warped door, or damaged mounting surface. Those conditions require an appropriate repair or structural assessment before reliable alignment is possible.